This workshop will be a lot like a strenous hike. For 90 minutes you will follow a steep trail of steps carefully, one wrong move and you could tumble back to the start (intense!), but I hope you’ll decide once we reach the summit its worth it. To help you realize that lets look at a couple of examples.
LiDAR: Light Detection and Ranging, is a remote sensing method that uses light in the form of a pulsed laser to measure ranges (variable distances) to the Earth.
NAIP: National Agriculture Imagery Program acquires aerial imagery during the agricultural growing seasons in the continental U.S. Images available within year of acquisition and are freely available. Spatial resolution is .6-2meters, Spectral resolution is 4 band (Red, Green, Blue, and Near Infrared), and is acquired on a 3-year cycle.
PDAL: Point Data Abstraction Library is a C++ library for translating and manipulating point cloud data. It allows the user to compose operations on point clouds into pipelines. While its focus is many on LiDAR it is not limited to this form of data.
Orthoimage: An aerial photograph or satellite imager that has been geometrically corrected (orthorectified) and given a map projection. Often referred to as a digital orthophoto quadrangle (DOQ).
LAS and LAZ: A LAS file is an industry-standard binary format for storing airborne LiDAR point cloud data. LAS files can be large so are often compressed to the LAZ format in order to transfer large amounts of LiDAR data.
MeshLab: Open source 3D modeling program. Compared with other open source tools, Meshlab has undeniable strengths when it comes to operating on pointcloud inputs. Outputs can be 3D meshes in a variety of formats with or without textures.
Mesh: A representation of a object in a computer program where its surfaces are represented by vertices in x,y,z space with edges between them comprising geometric faces.
Screened Poisson: Surface reconstruction technique that creates watertight surfaces from oriented point sets.
Zero Area Faces: Faces with zero area, such as faces with all vertices at the same point or faces with two edges at the same position (forming a single line), are selected.
obj file format: A format for describing a 3D object which is plain text so each vertex and face has a line in the file. It can be a very ineffecient storage method, but is a very established format so its a good format for sharing between programs.
Blender: Blender is a free and open source 3D creation suite. It supports the entirety of the 3D pipeline—modeling, rigging, animation, simulation, rendering, compositing and motion tracking, video editing and 2D animation pipeline.
glb format (for web): Another 3D model file format. The GLB file format is a binary form of glTF that allows us to put textures animations and model structure descriptions in a single file.
gltf: A standard file format for three-dimensional scenes and models, non-binary so actual text description of the model. This will be a larger file than the glb equivalent.
Glitch: Web platform for anyone to create websites for free with little effort, or no effort through copying existing projects on glitch. application created for people to build simple web applications using JavaScript. No account needed, but websites created will only last 5 days without an account. Can use Gmail or other existing accounts as stand in.
Assets: These are files that you provide to the glitch website.
For this workshop we will be using Lidar data and orthographic imagery. It is worthwhile to take a brief moment to explain what these are
+ - and home buttons in the top left corner of the maplidar within AOIRelated External Resources.laz resourceFor this section you will need to install miniconda to follow the steps verbatim. If you have your own existing python code setup then I will assume you know what’s going on and you’ll manage to get the required packages.
conda install --channel conda-forge pdal, which should give you a yes/no Option to install PDAL and its dependencies , go ahead and say yeslaspy with pip install laspyThis colorize.json will specify how to combine the ortho image with the lidar data. In order to use the pdal command to combine them we have to rename our files.
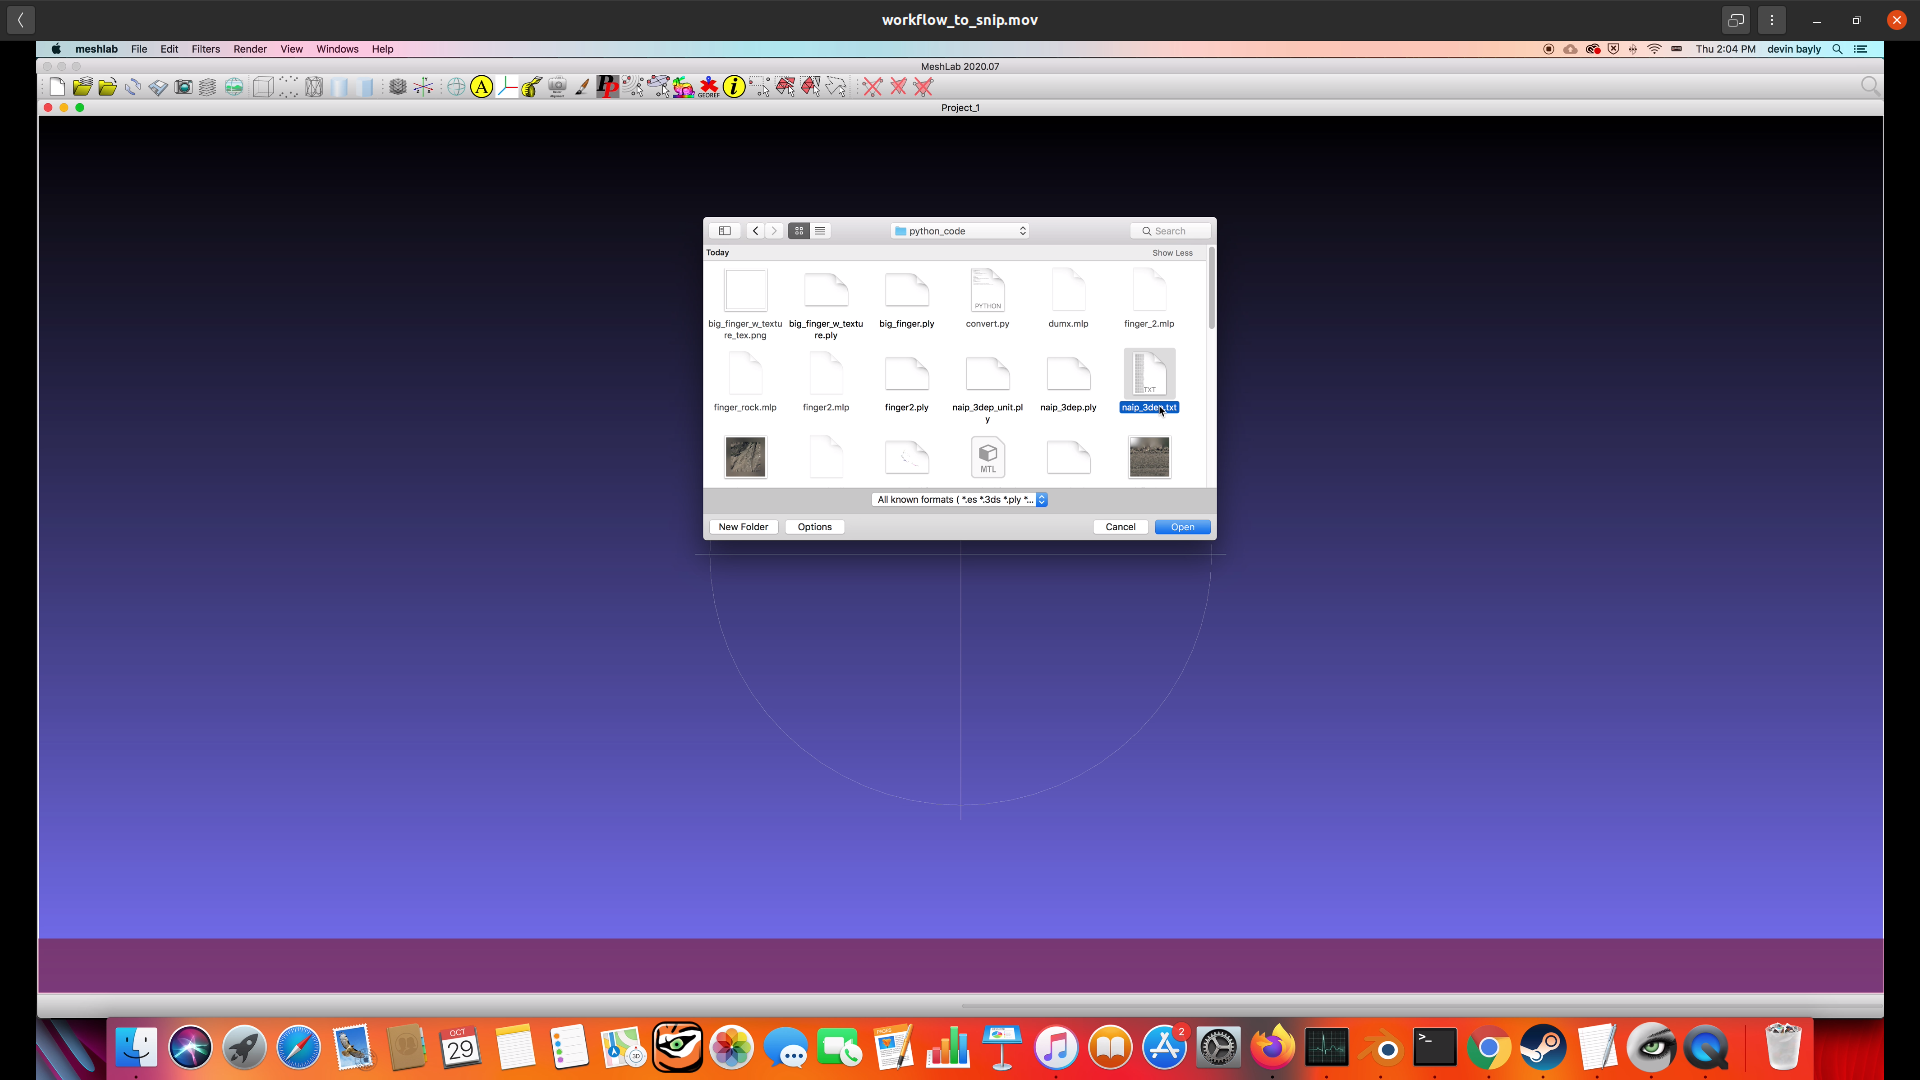
lidar.lazortho.tifpdal pipeline colorize.json.txt file that meshlab can readpython python_processing.py and you will convert the colorized.laz into colorized.txtImport the colorized.txt file screenshot
screenshot
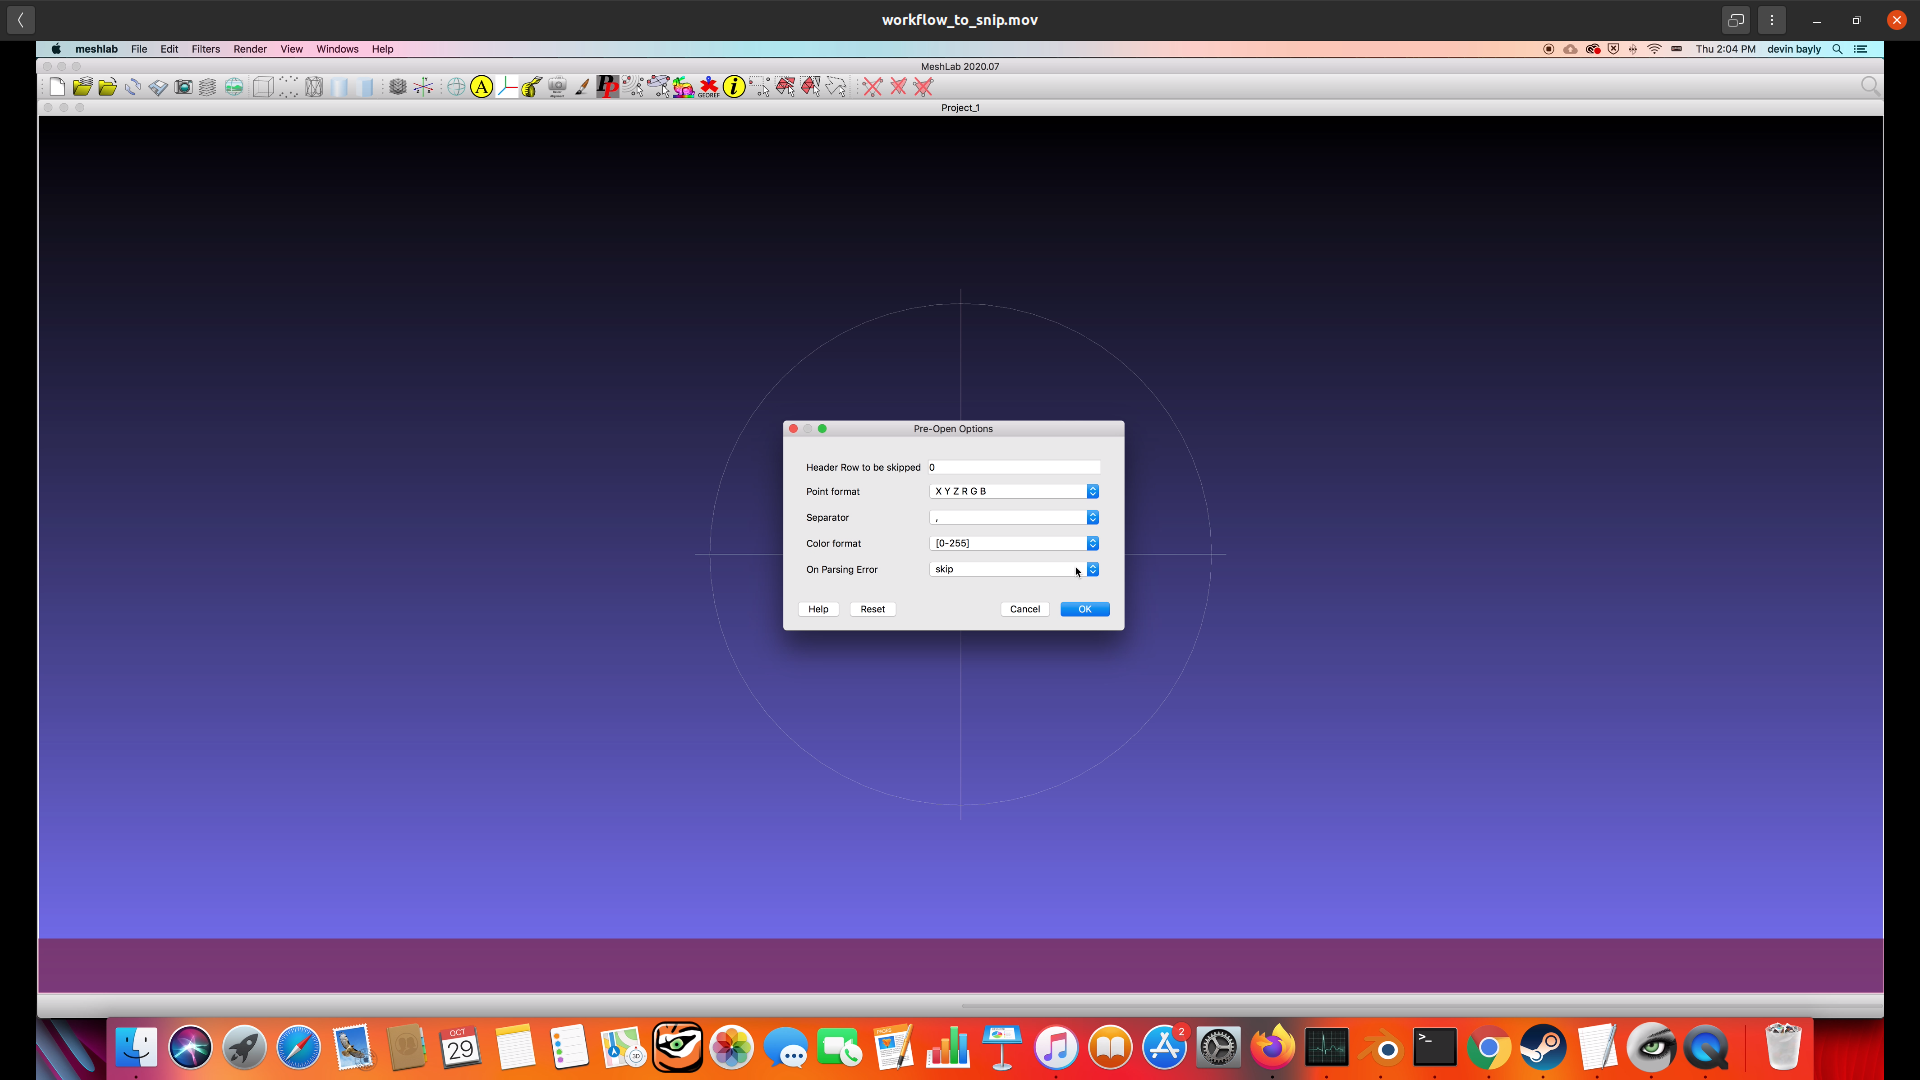
Select correct point format X Y Z R G B with separator , screenshot
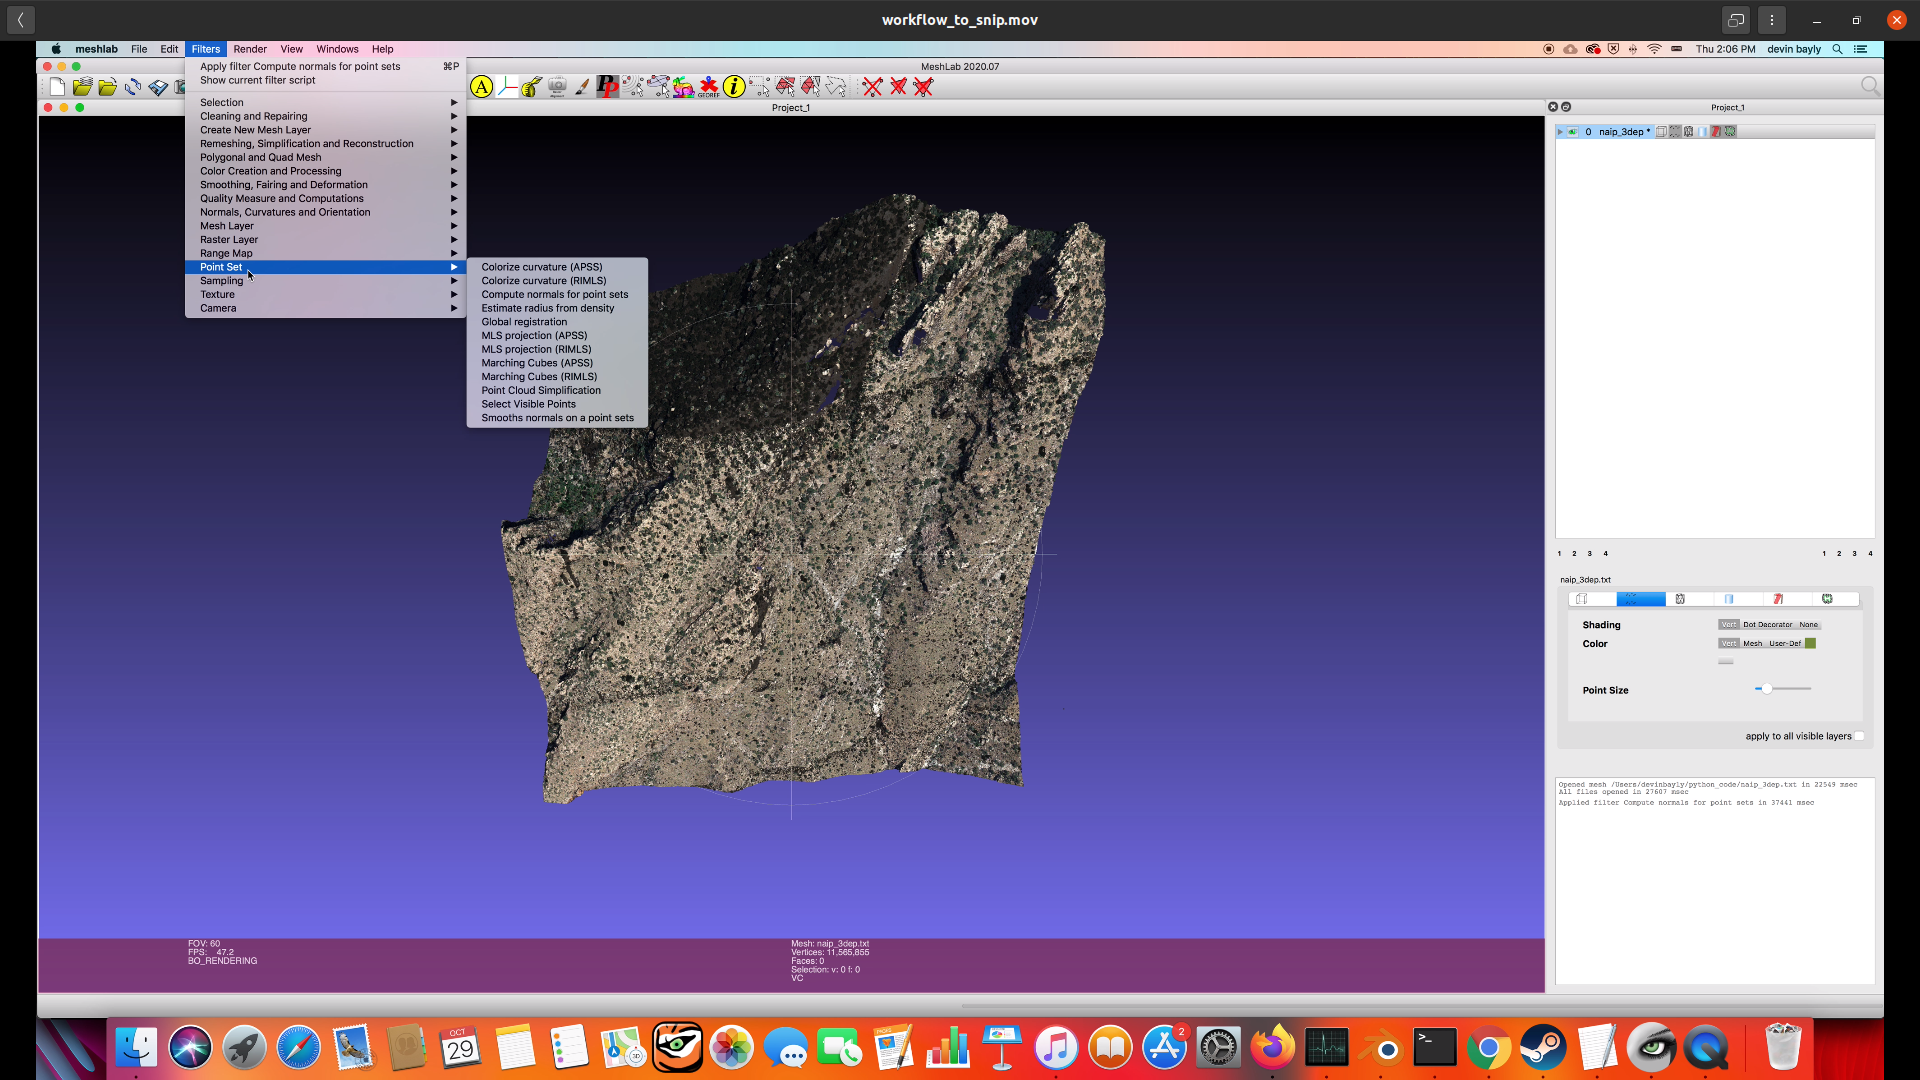
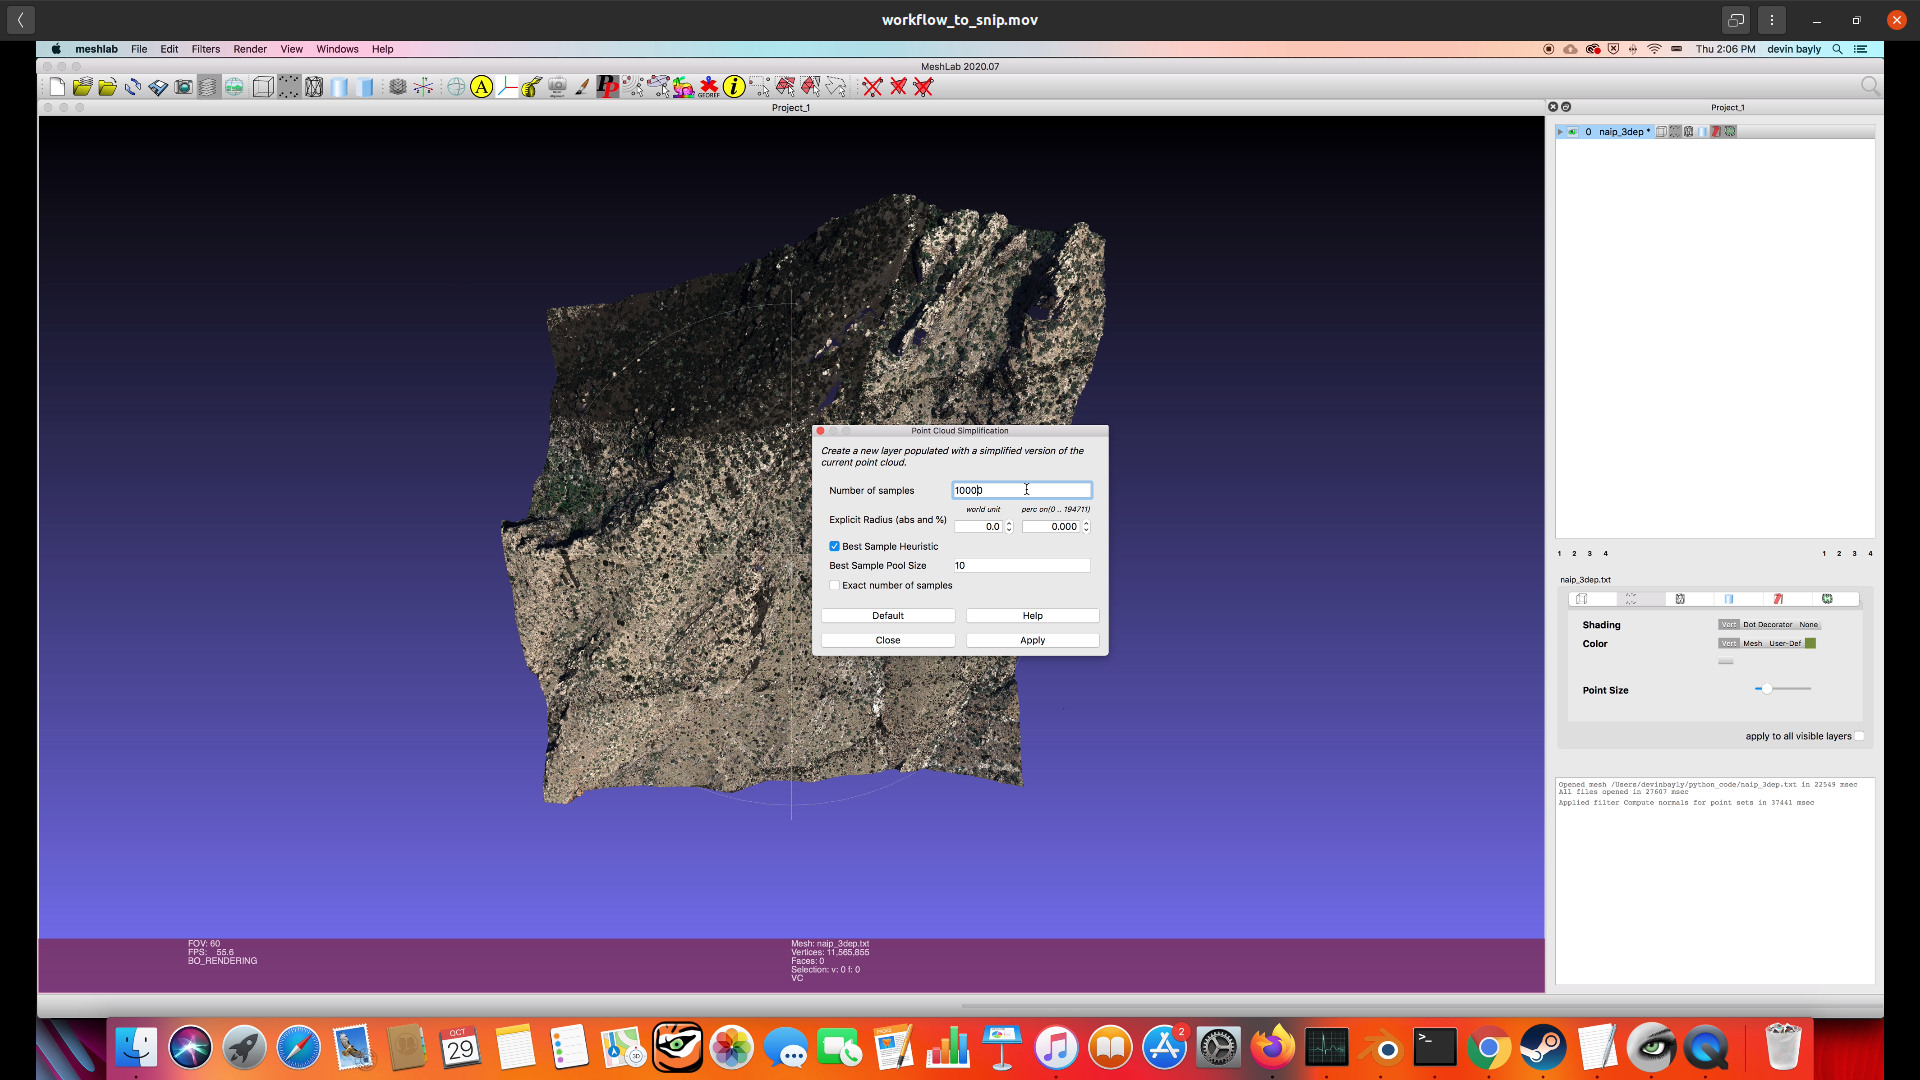
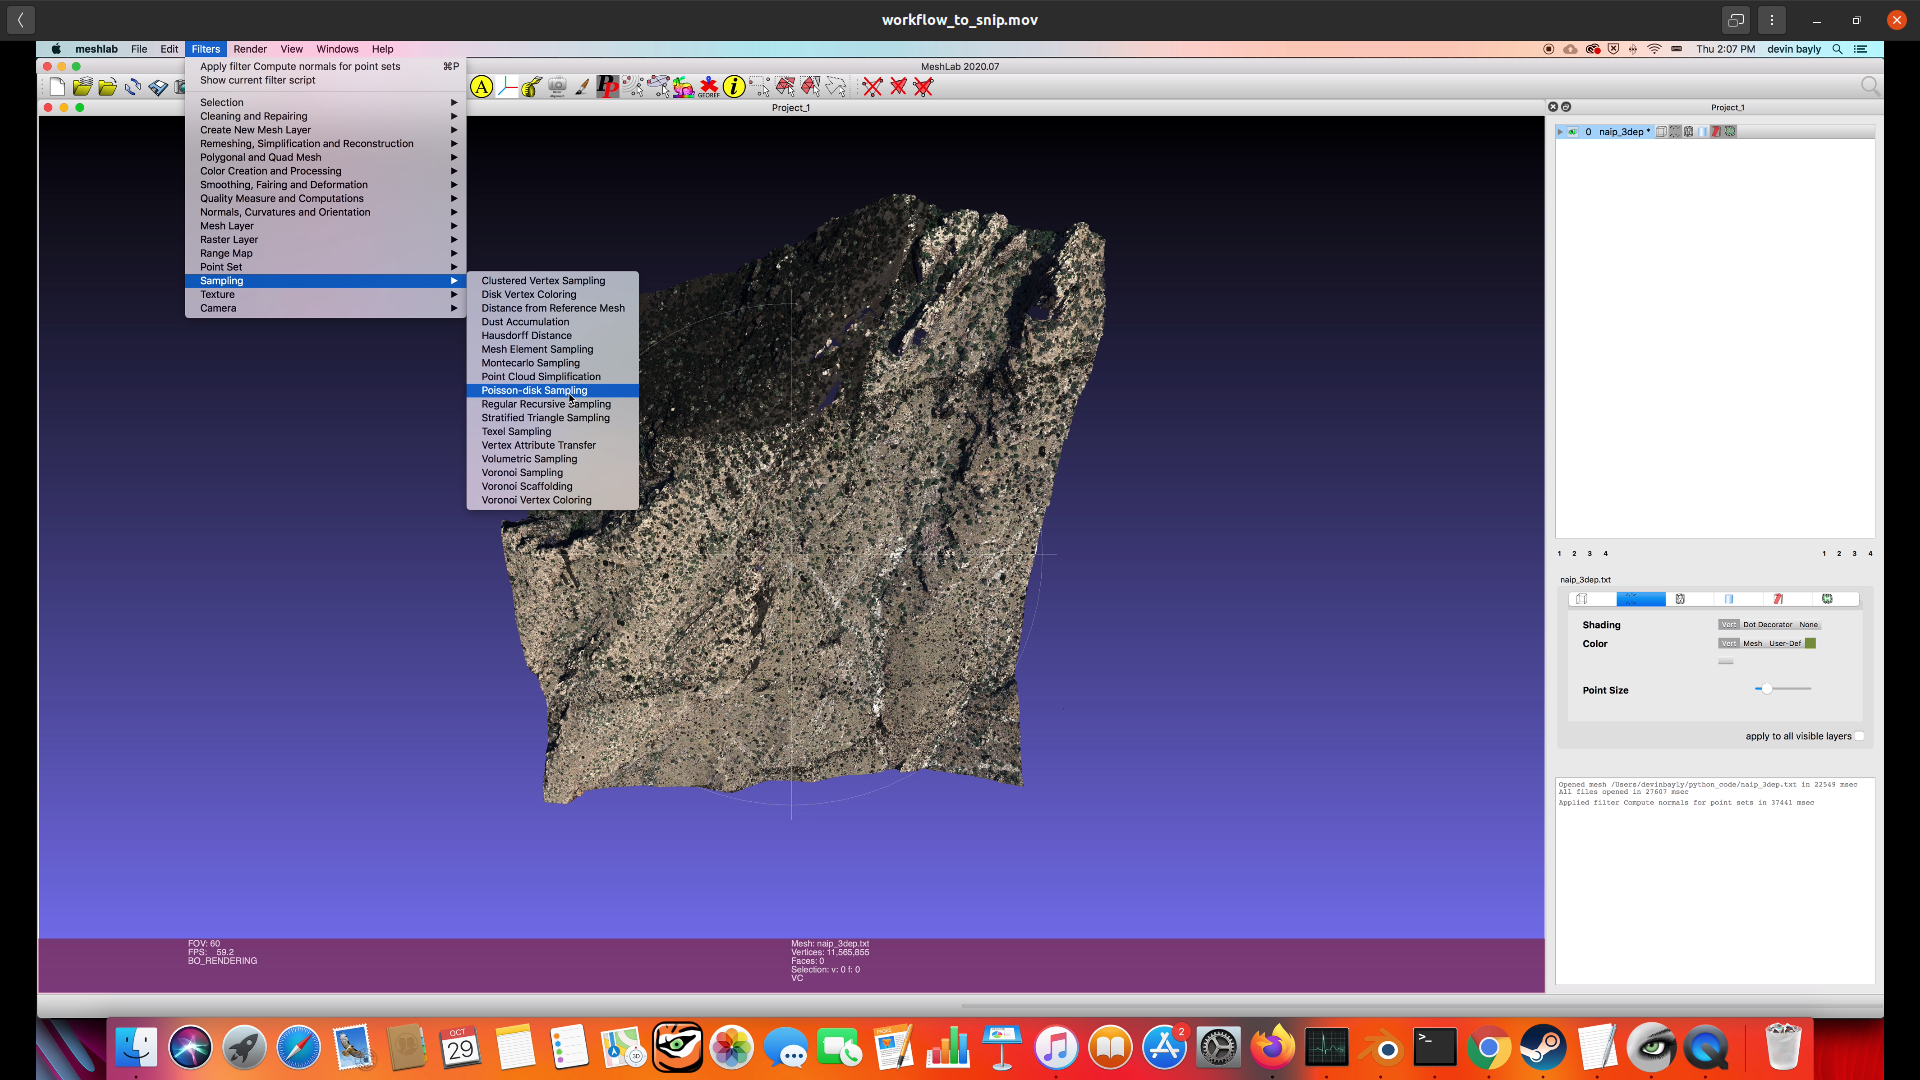
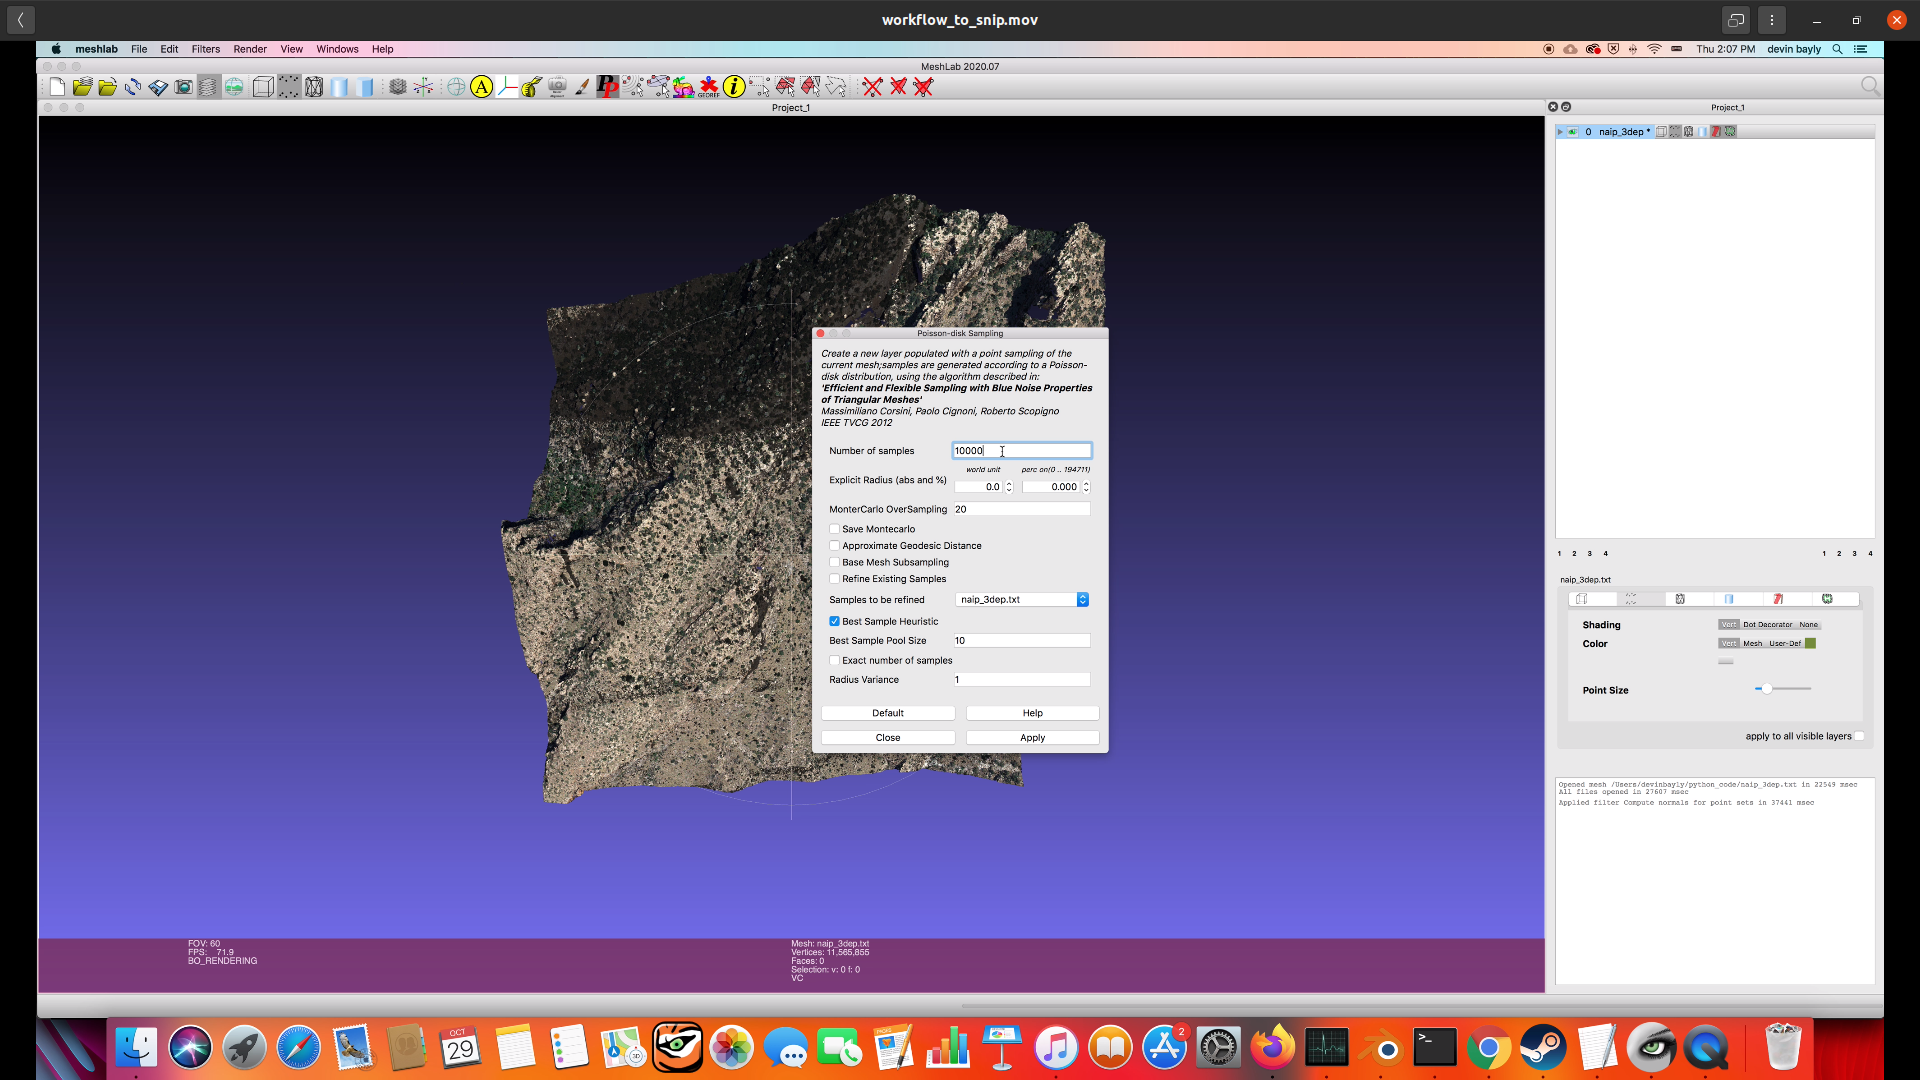
Or Poisson disc sampling screenshot screenshot
These steps can take some time to complete
Result should look a lot less densely packed, only about 7k points instead of 11 million screenshot
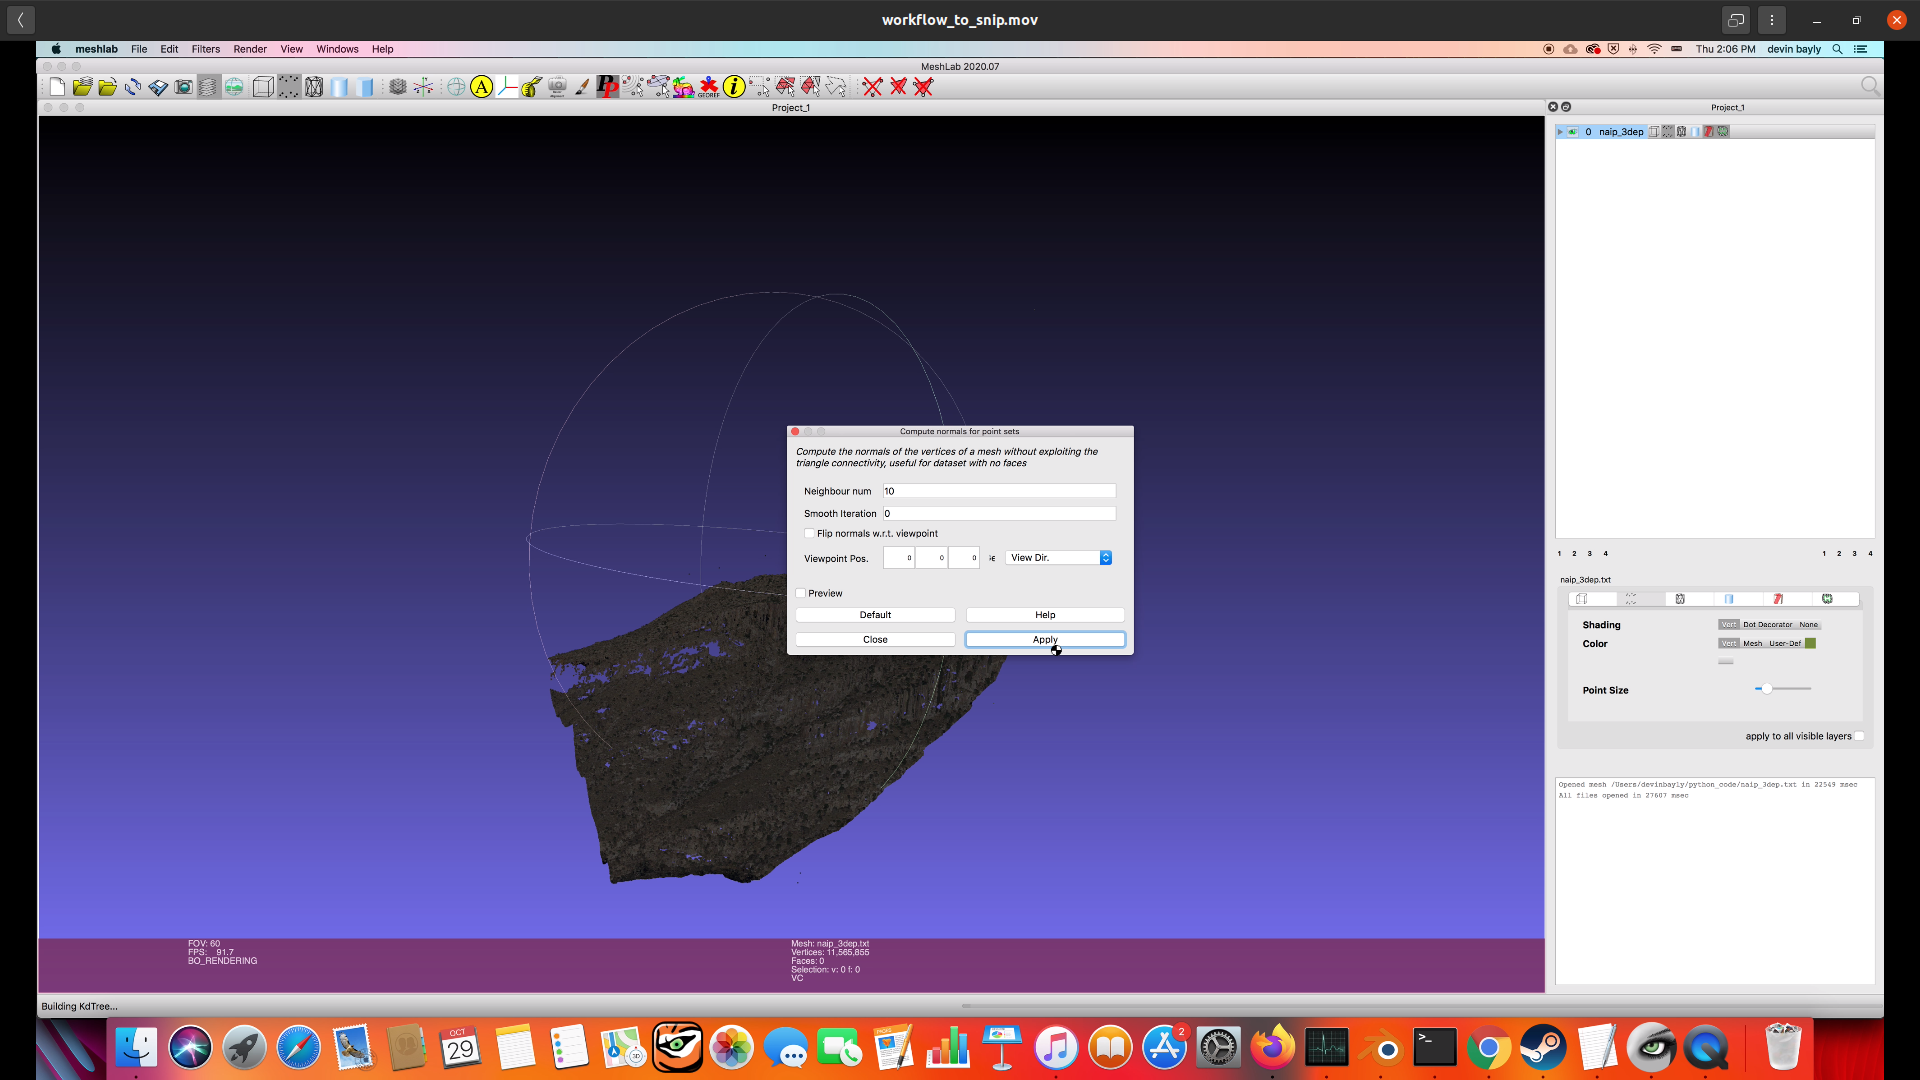
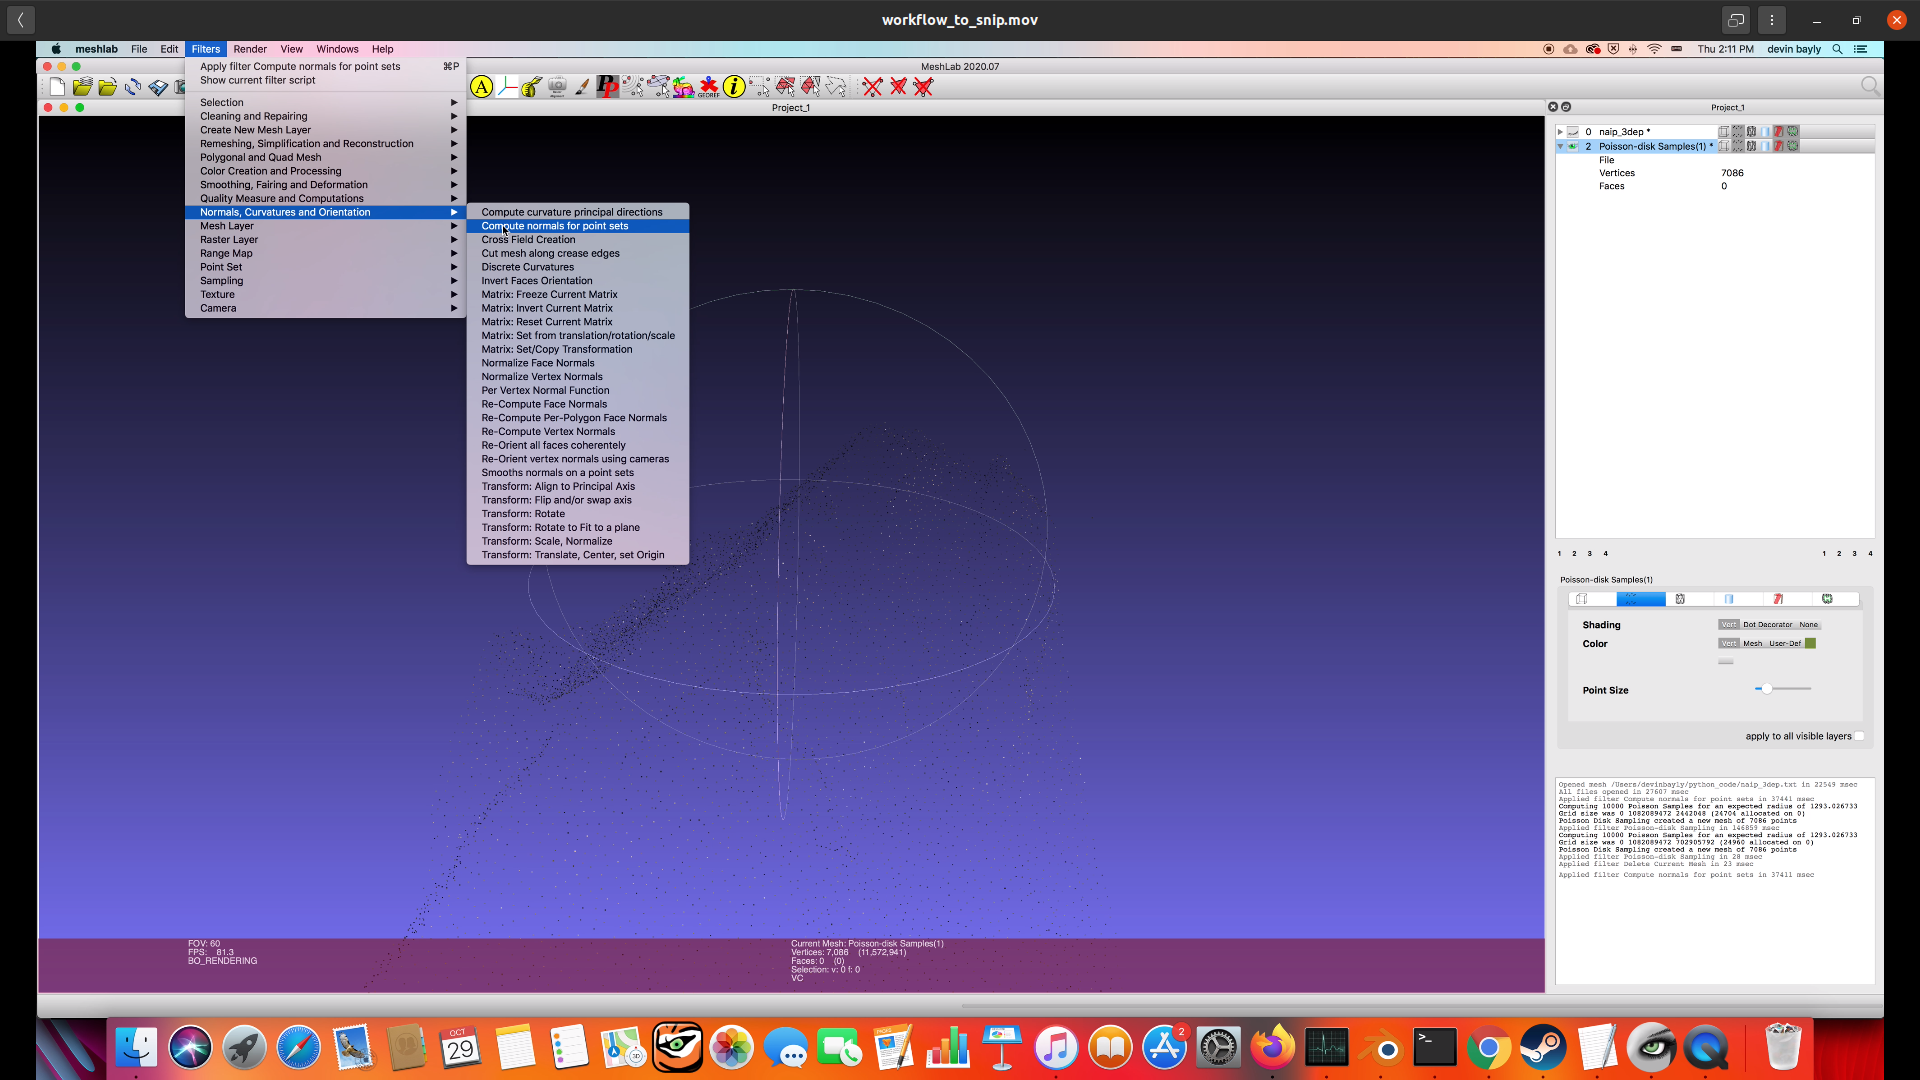
Calculate the normals of the new simplified point cloud, (make sure you have the new point cloud selected in the list on the right) screenshot
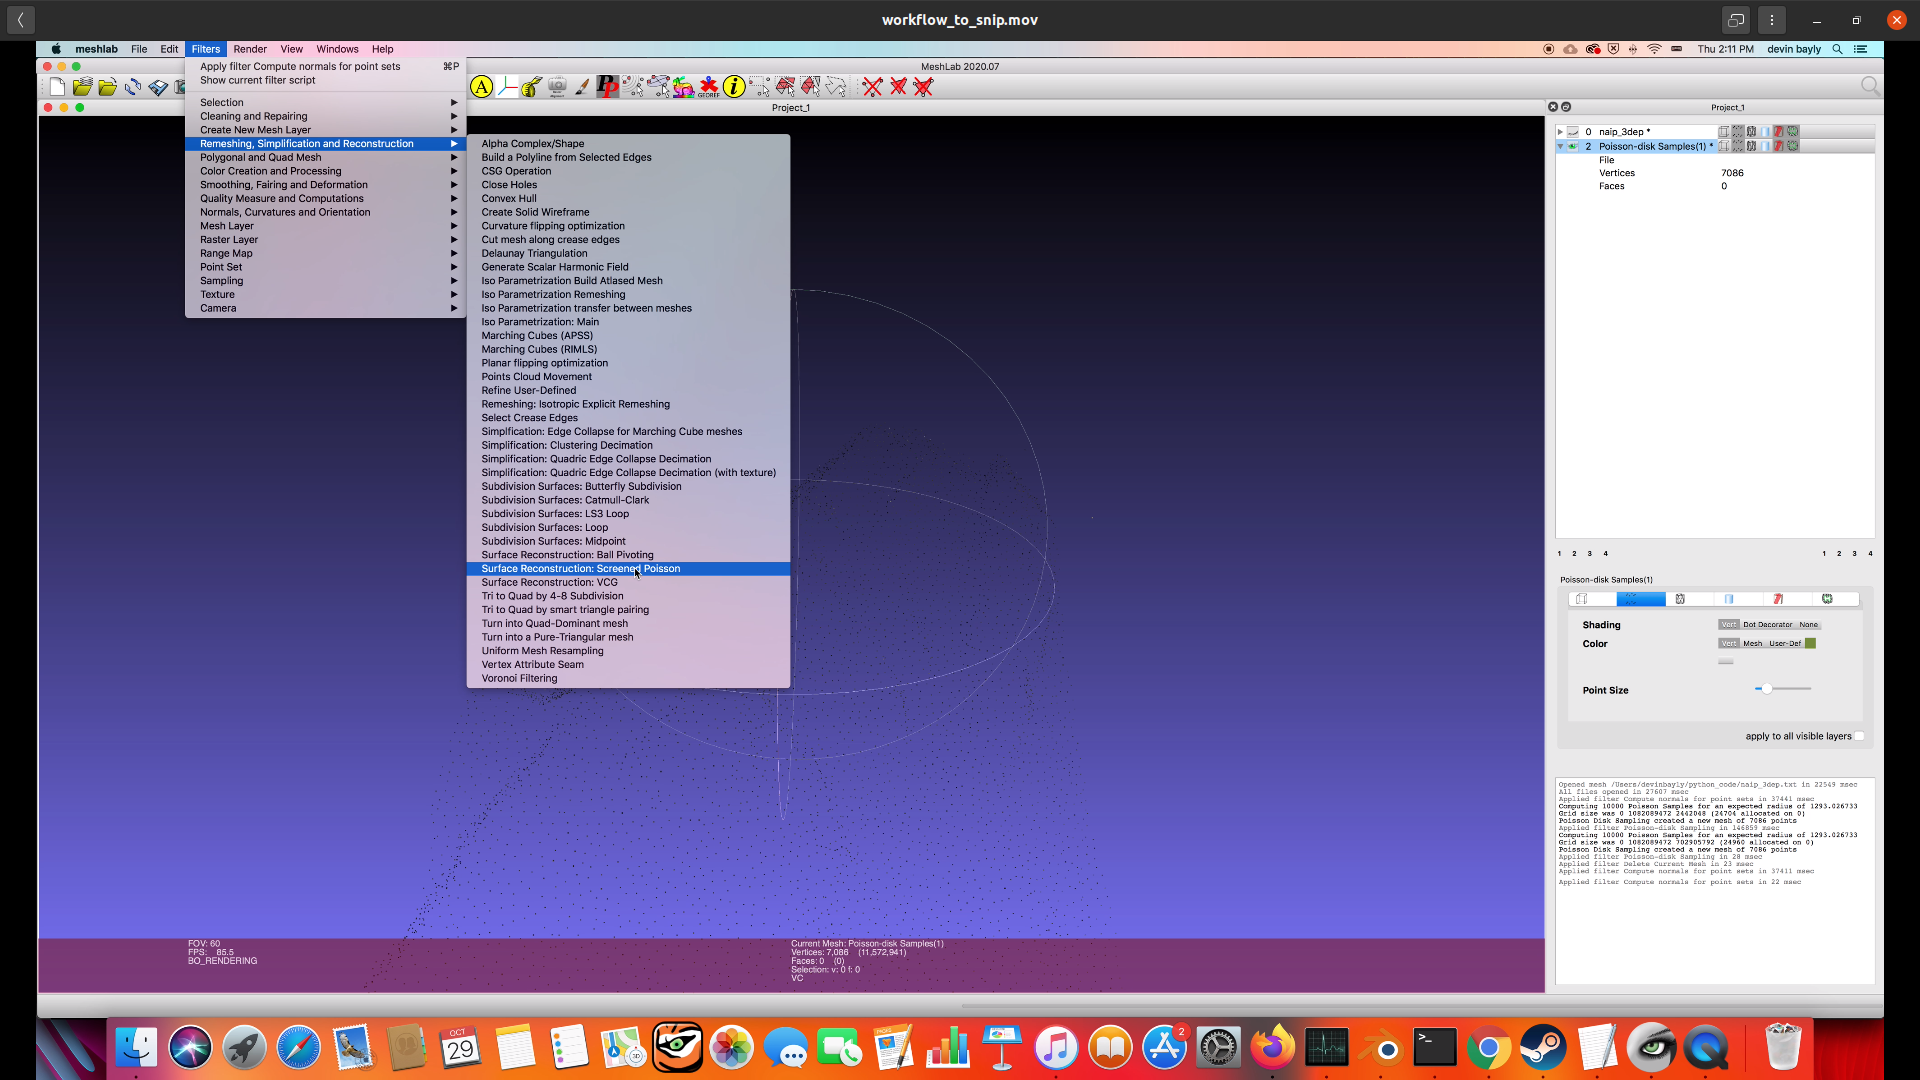
Perform a Screened Poisson reconstruction (optional increase the oct tree depth for more detail, but since we are already using the simplified point cloud it won’t do that much. ) screenshot screenshot
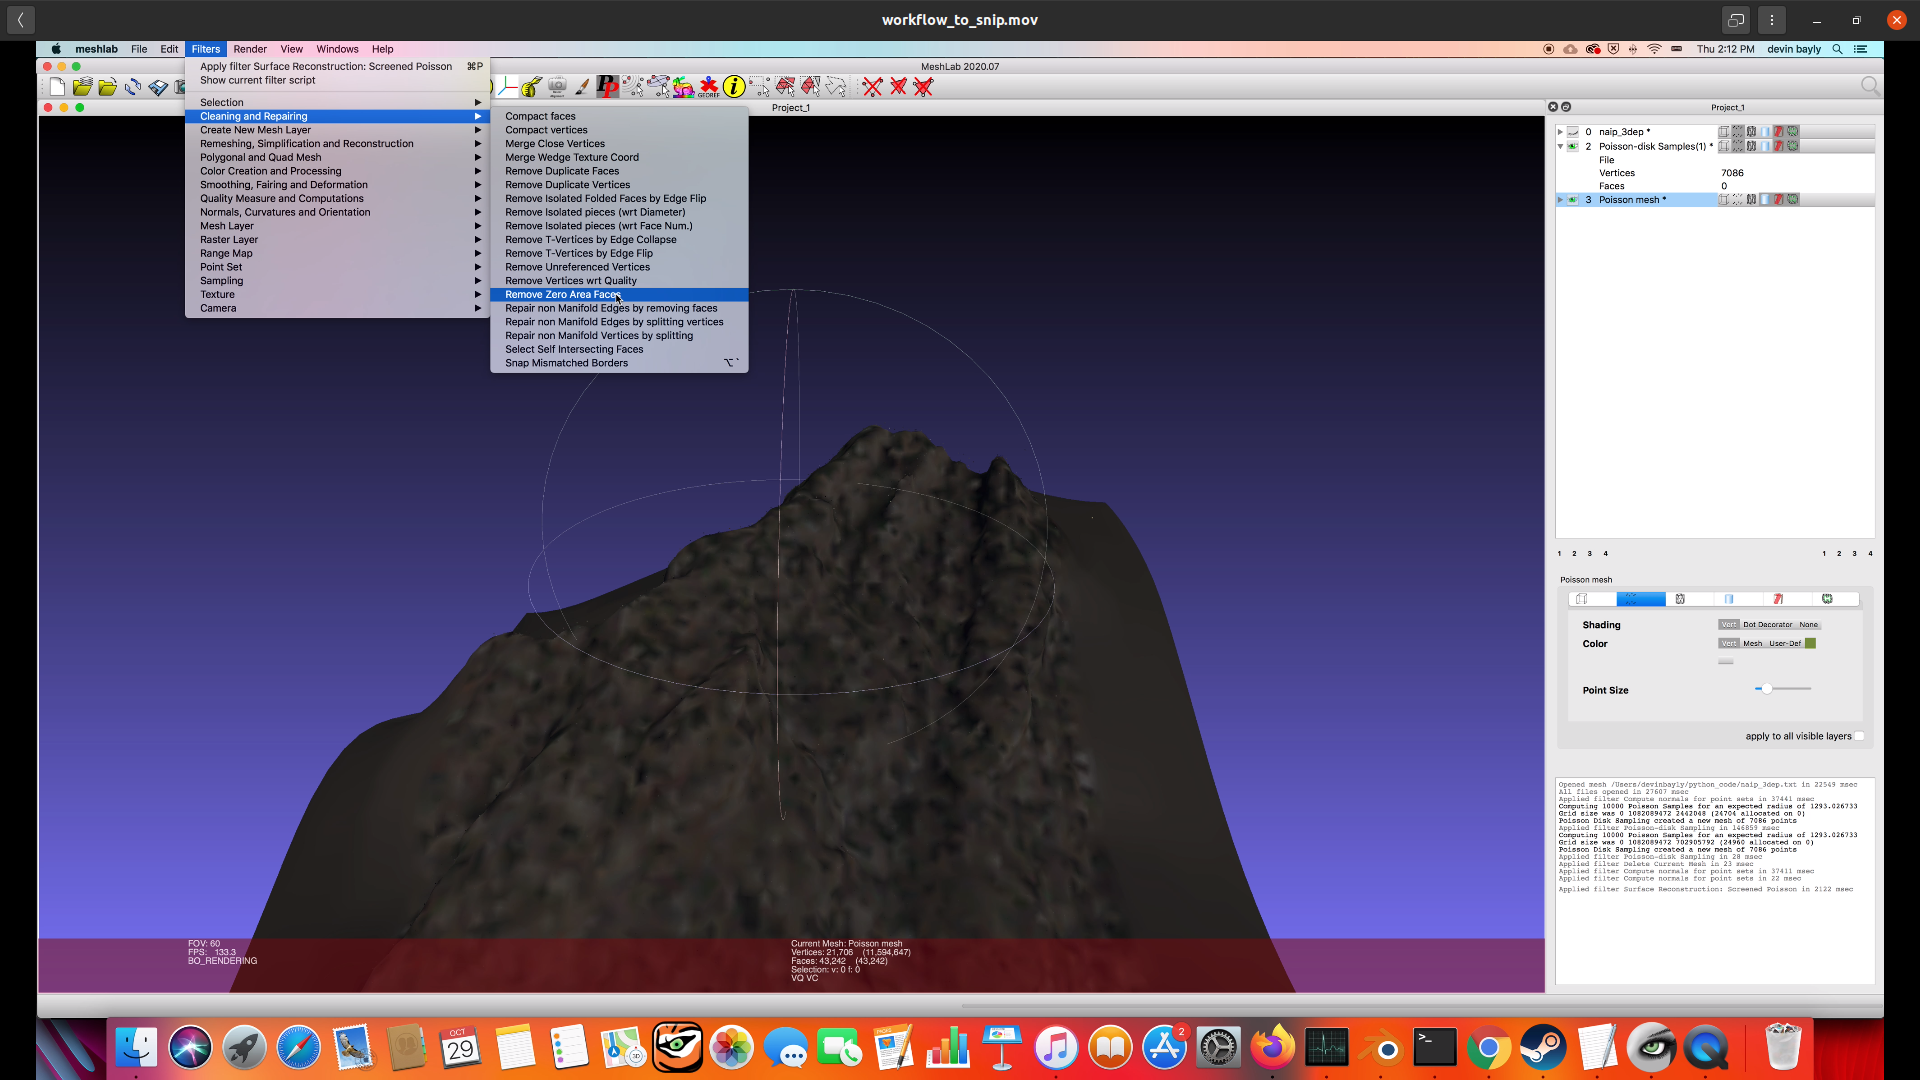
Remove zero area faces that sometimes get created by poisson reconstruction screenshot
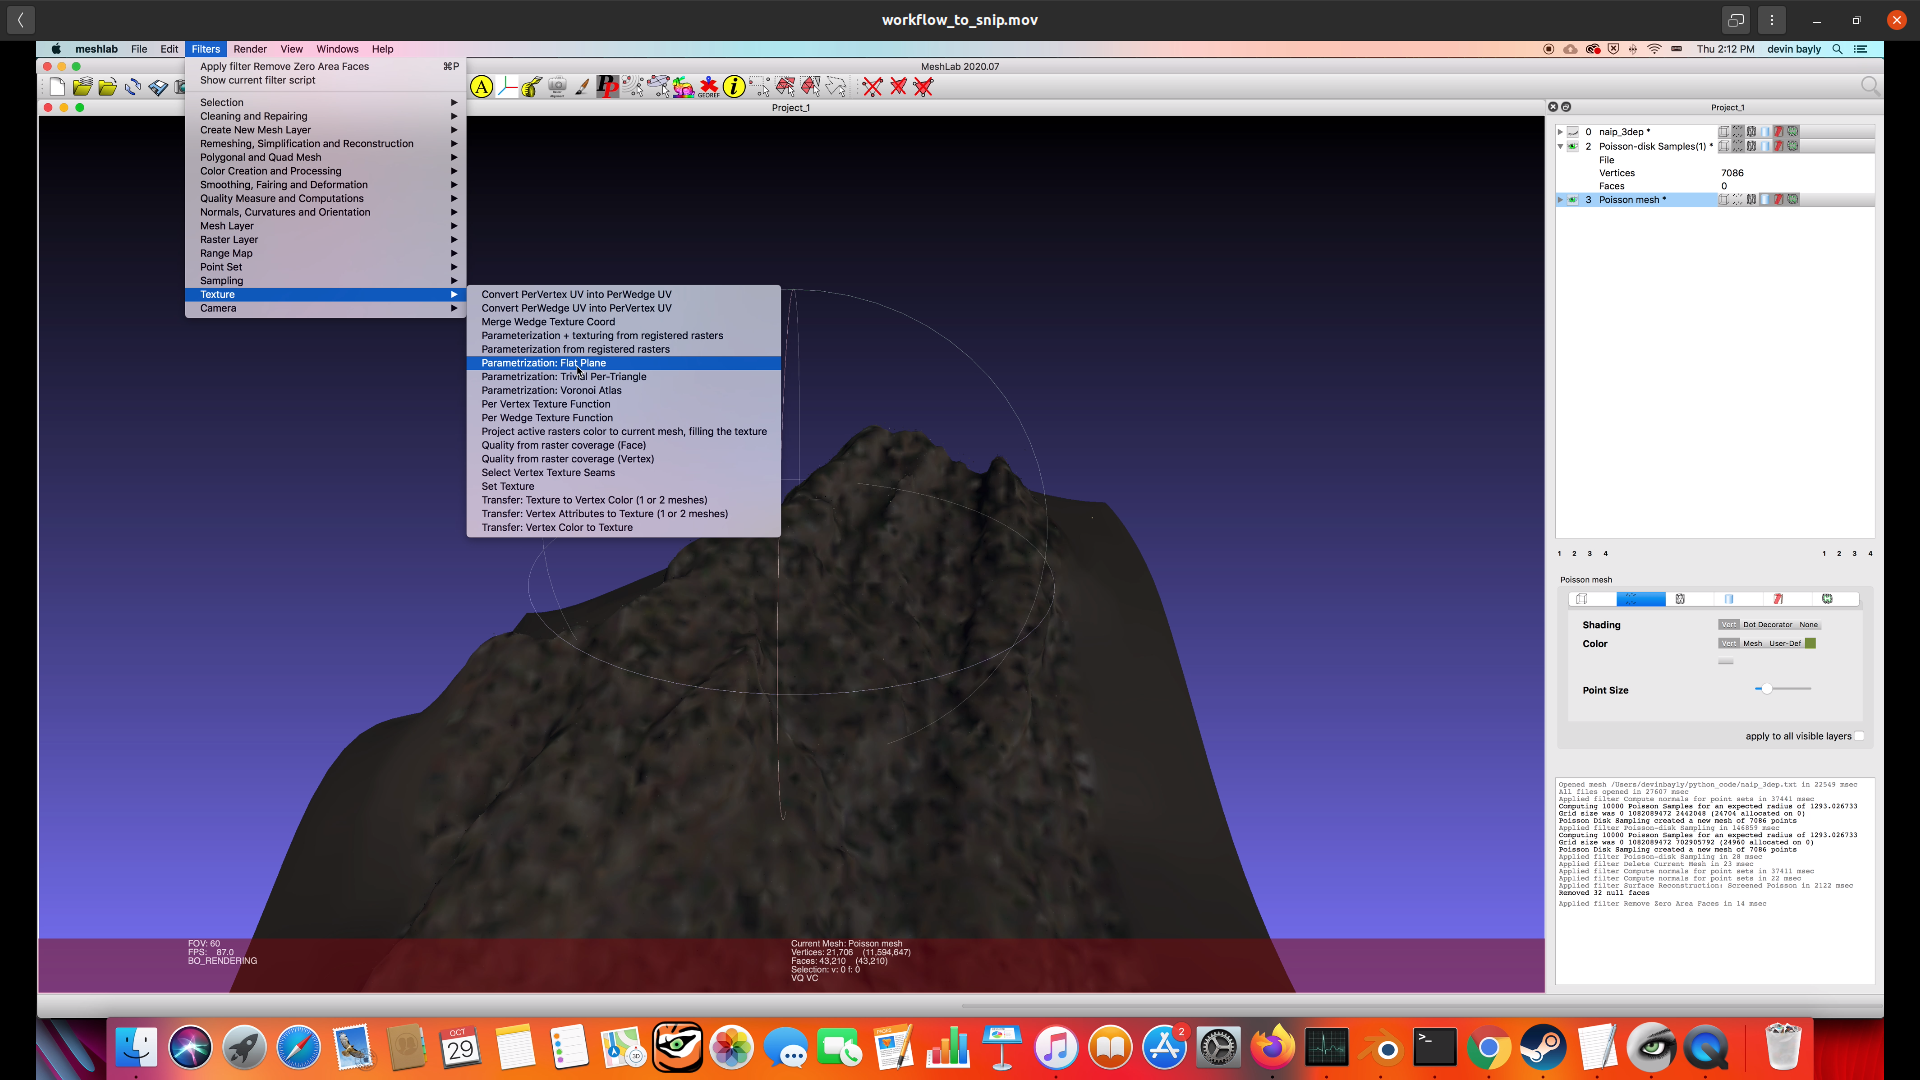
Perform a trivial plane parameterization which helps us know where the colors for our mesh should go screenshot
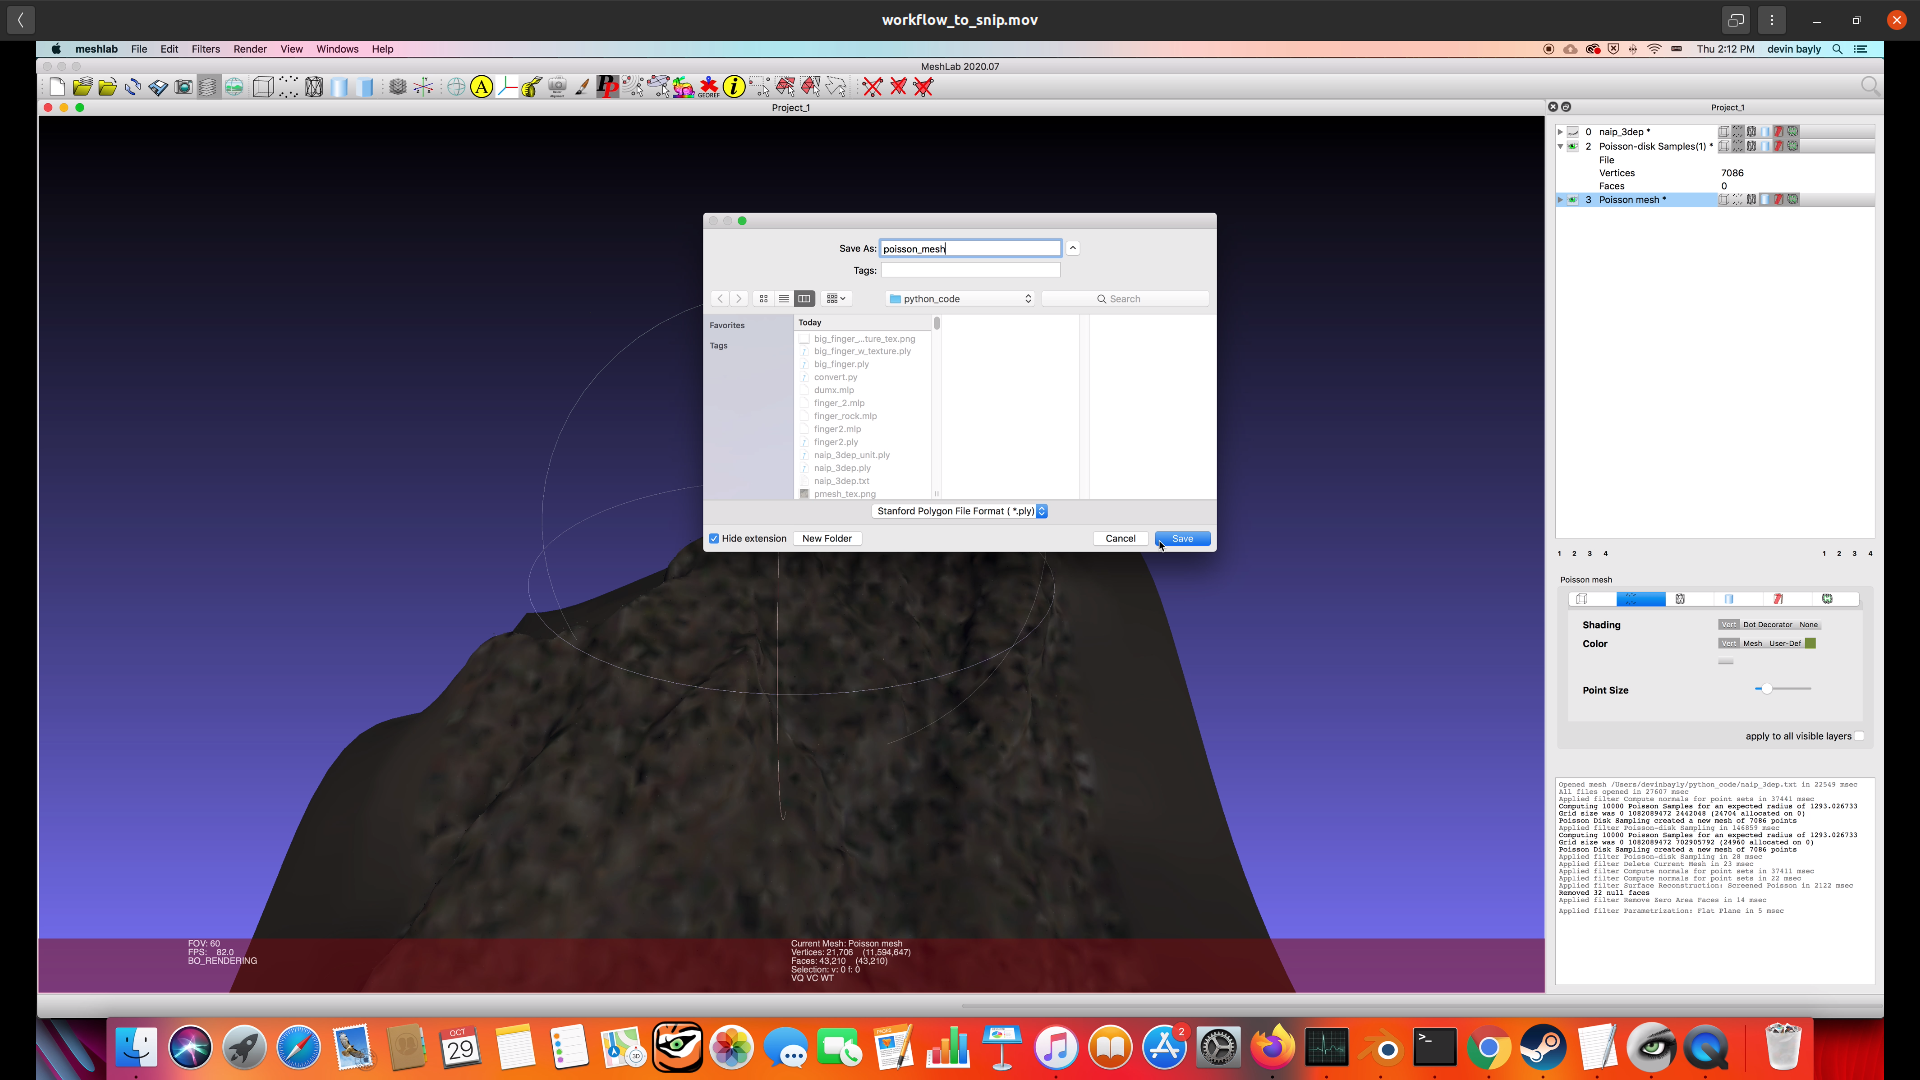
Save your project, put in names for each object you’ve worked on so far screenshot screenshot
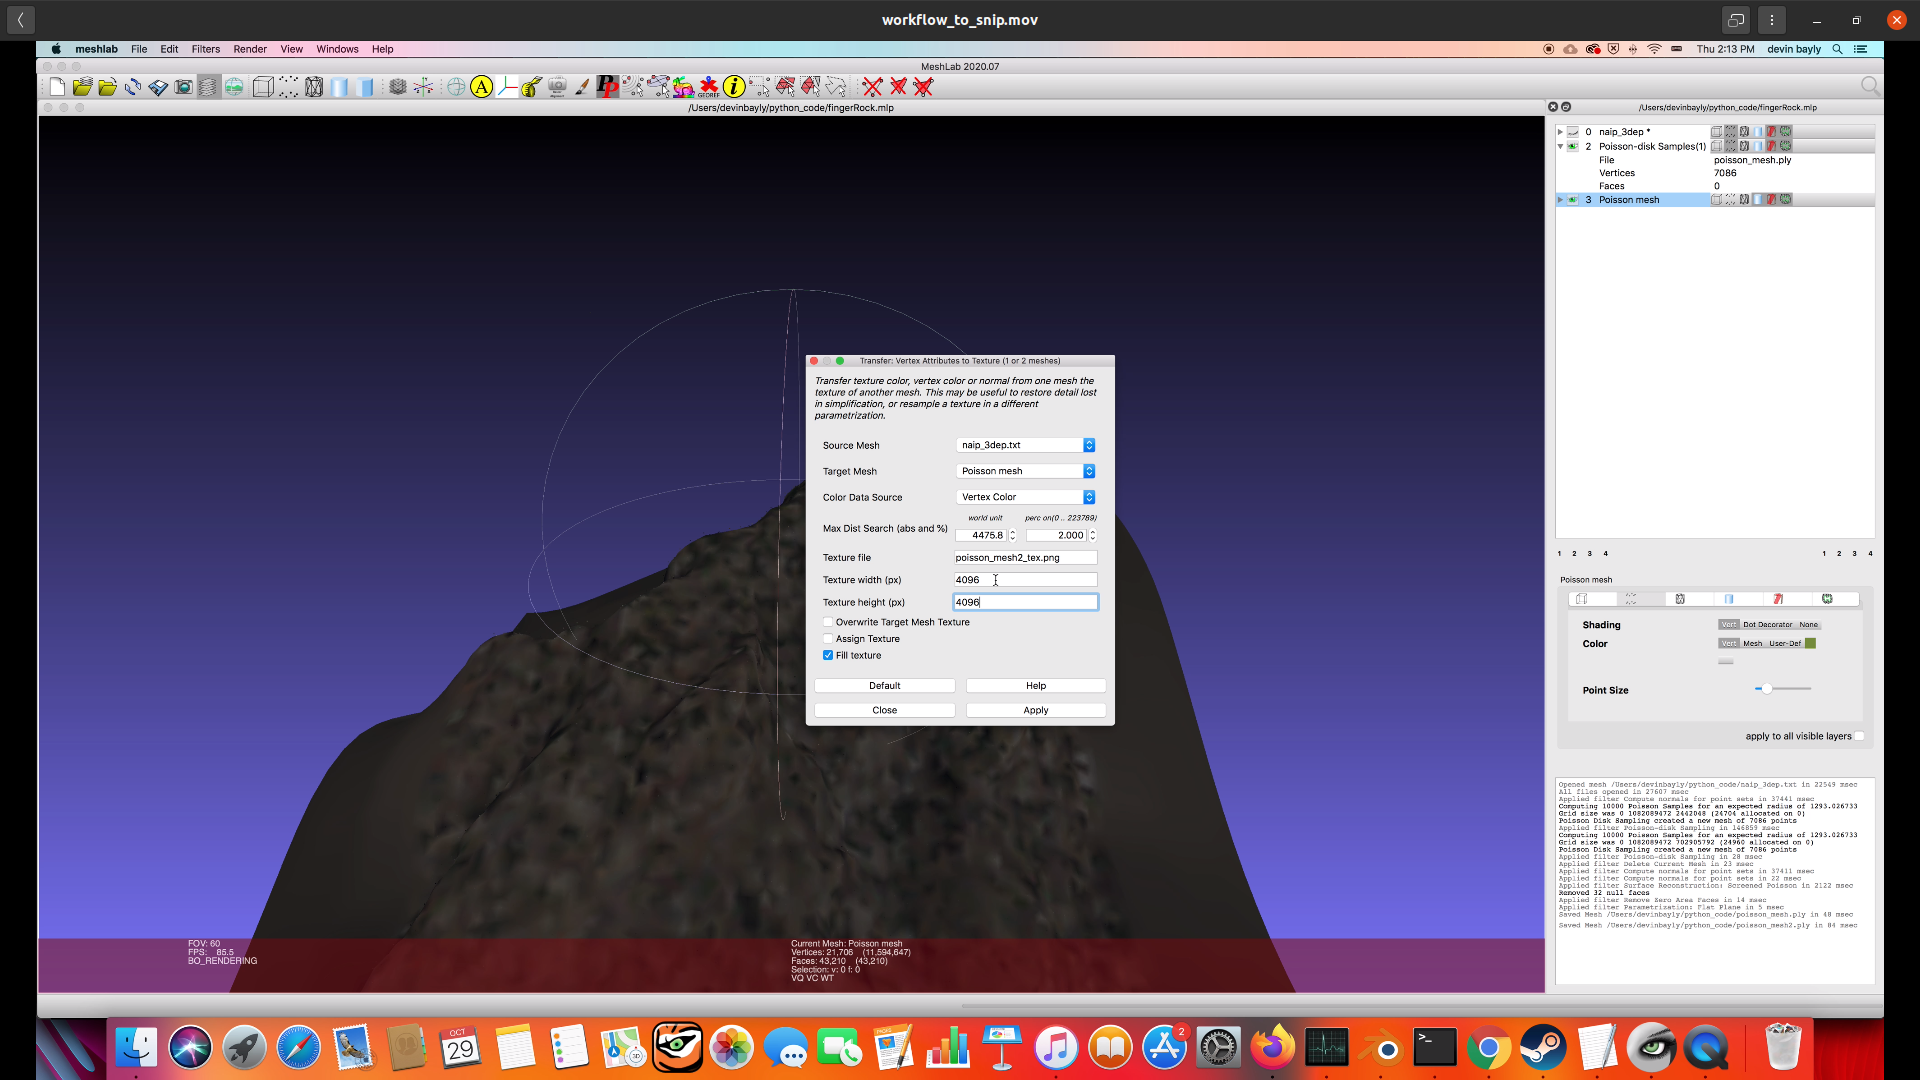
Transfer the vertex attributes of the original point cloud to the texture of the reconstruction screenshot
Texture width and height are atleast 4096 (higher numbers gives more resolution for final product ) screenshot
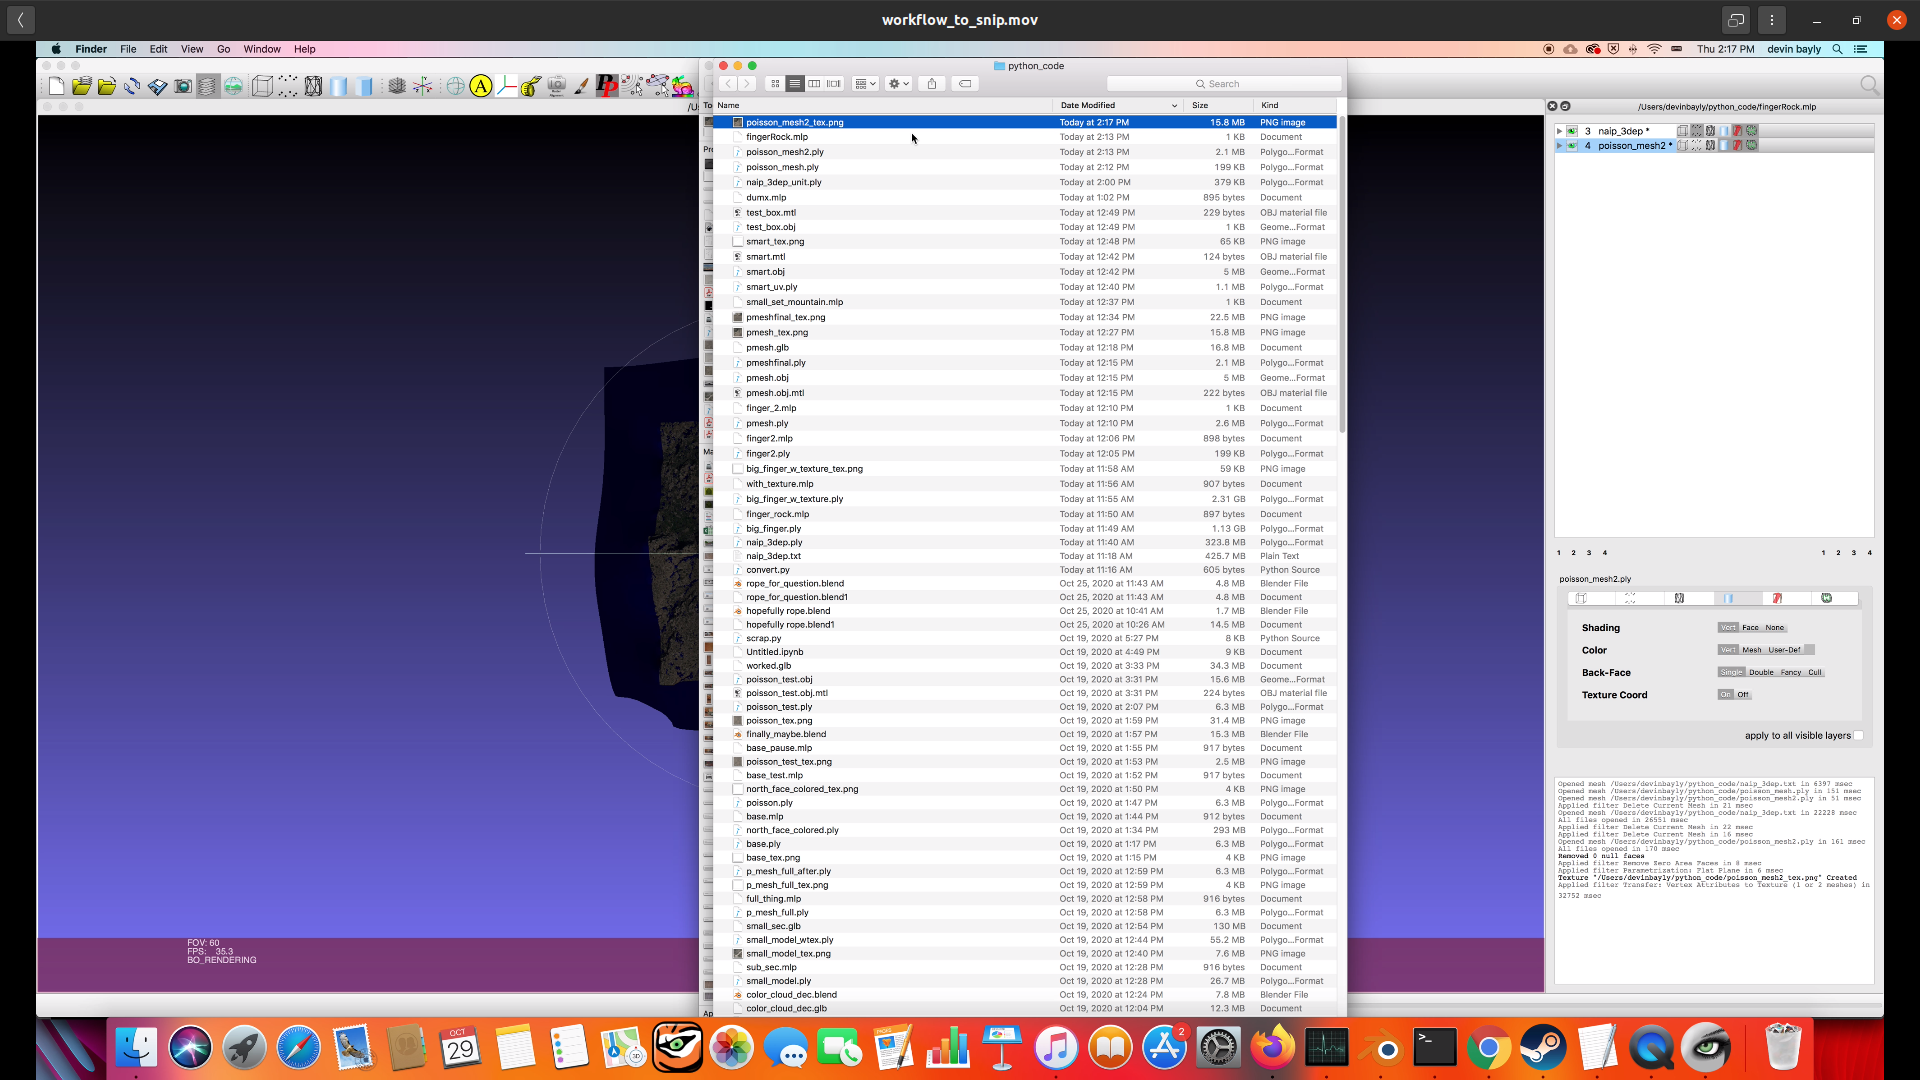
Check that a png has been created screenshot
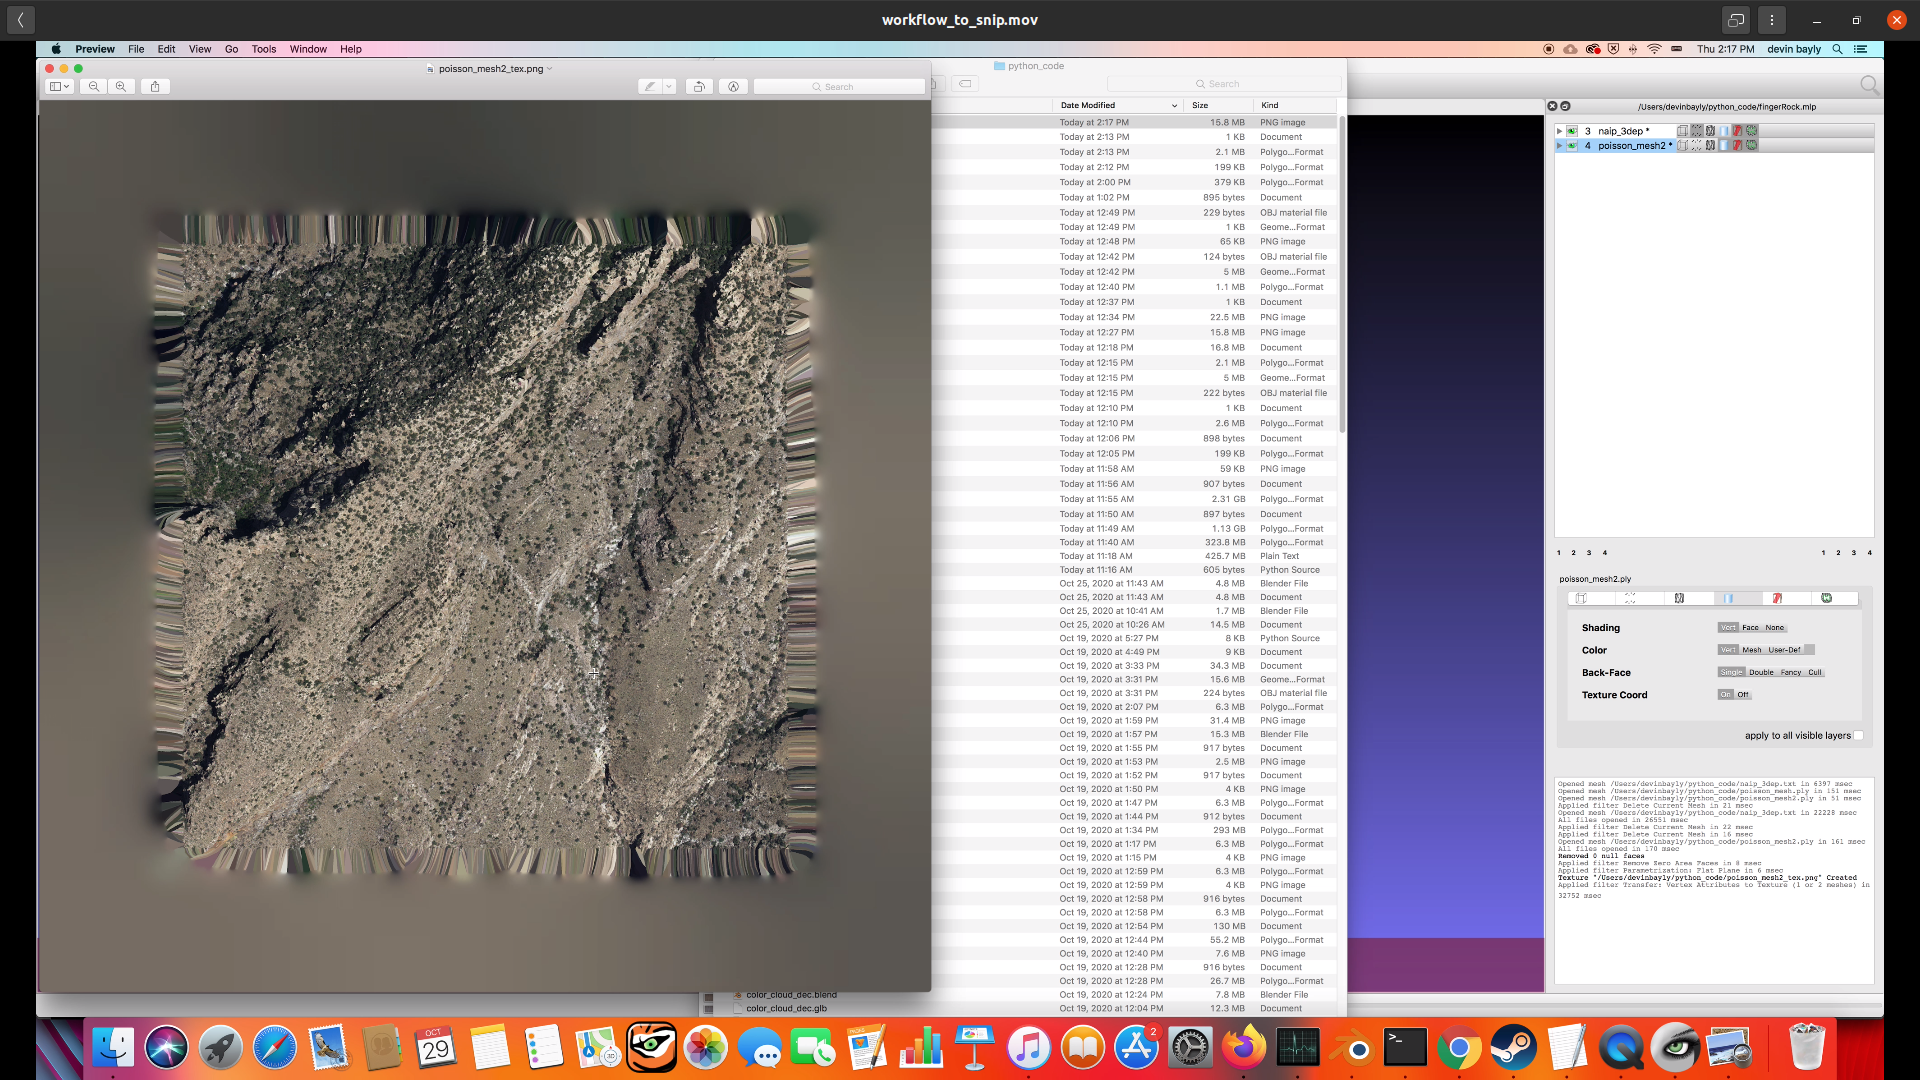
Inspect result screenshot
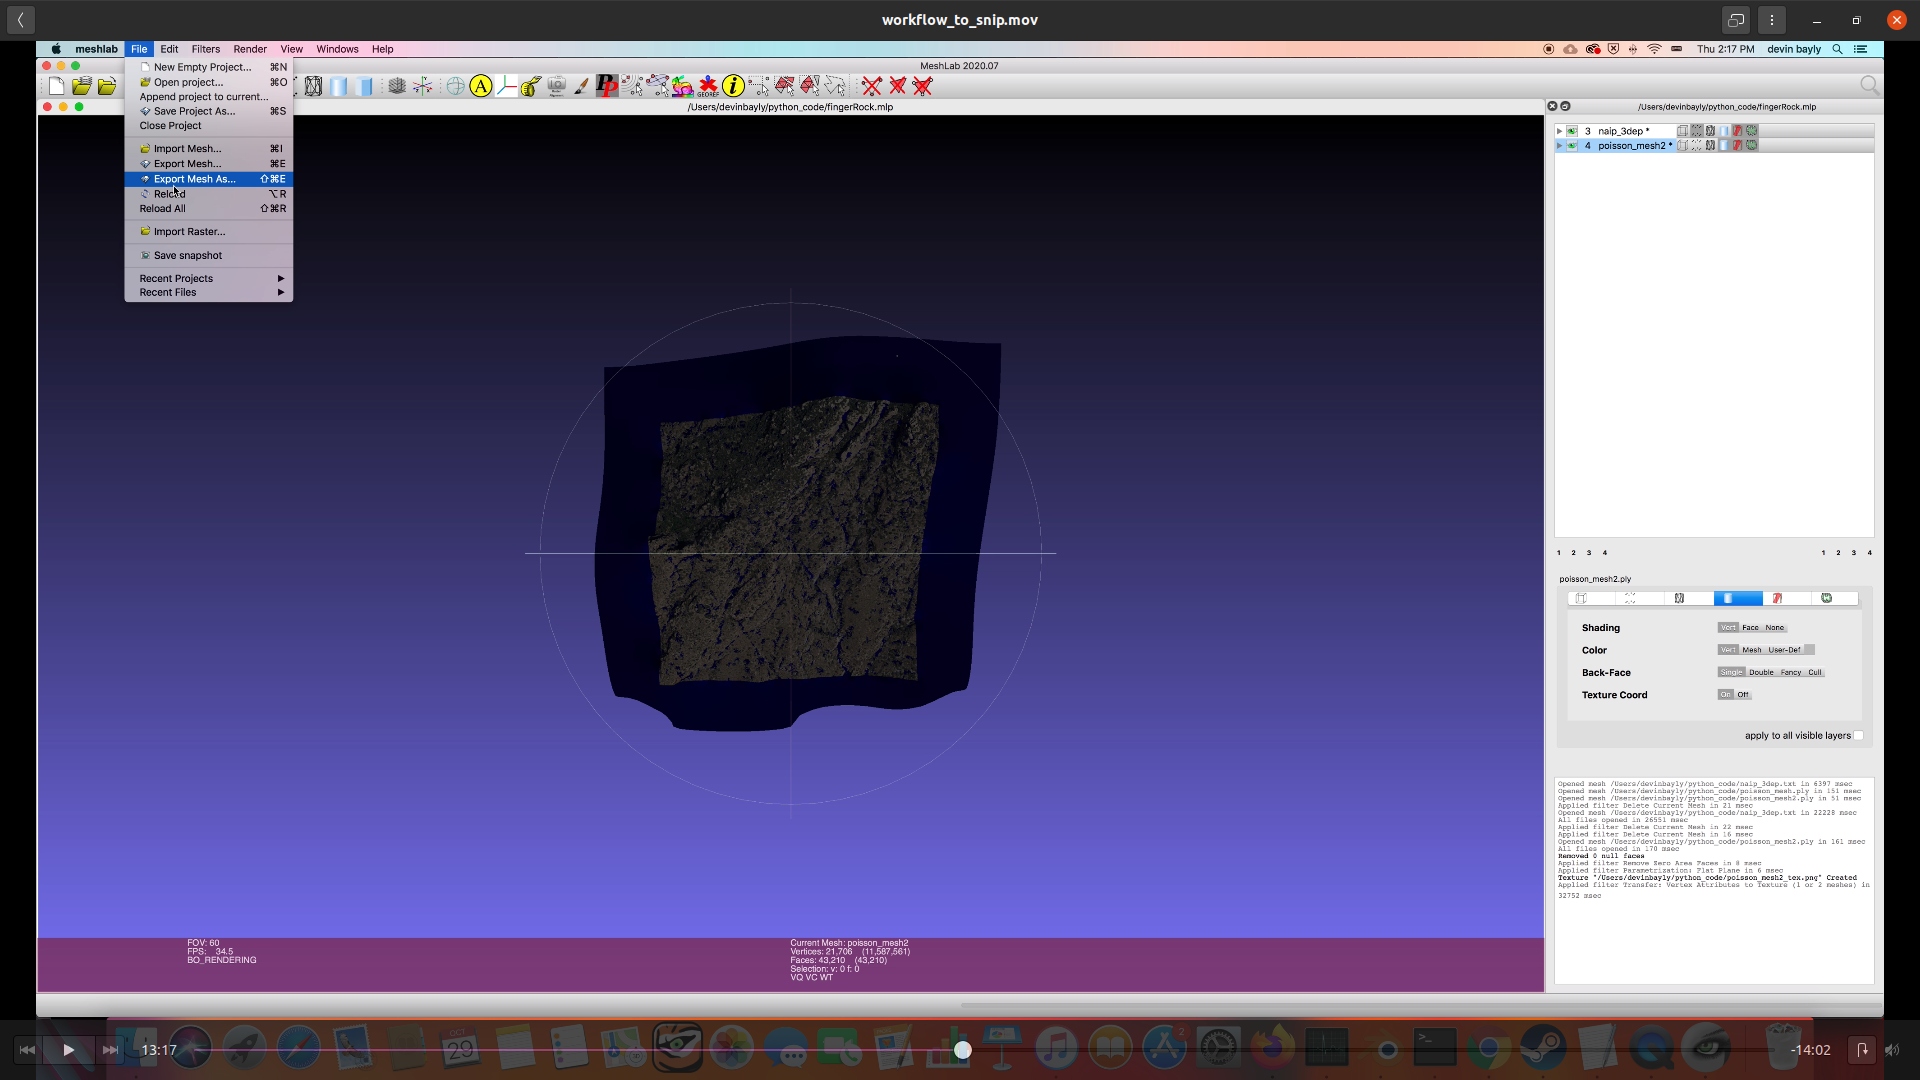
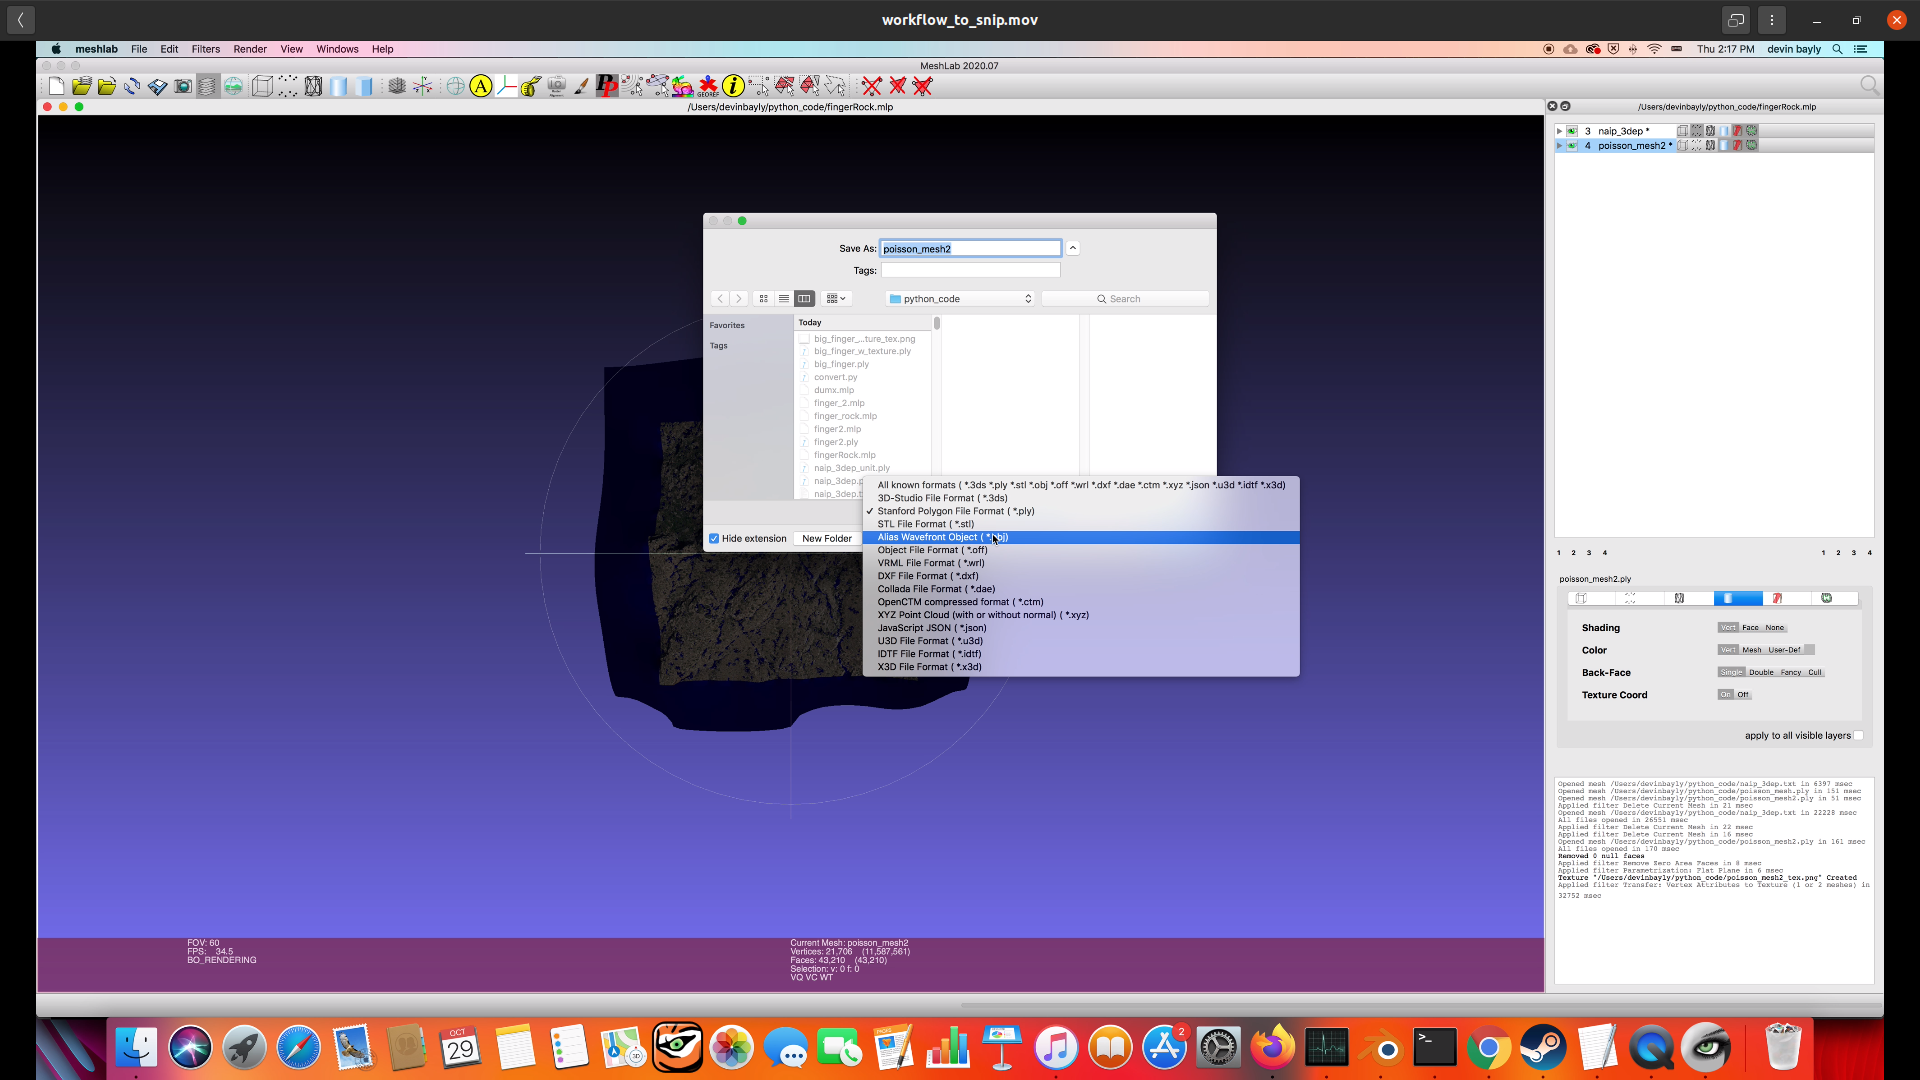
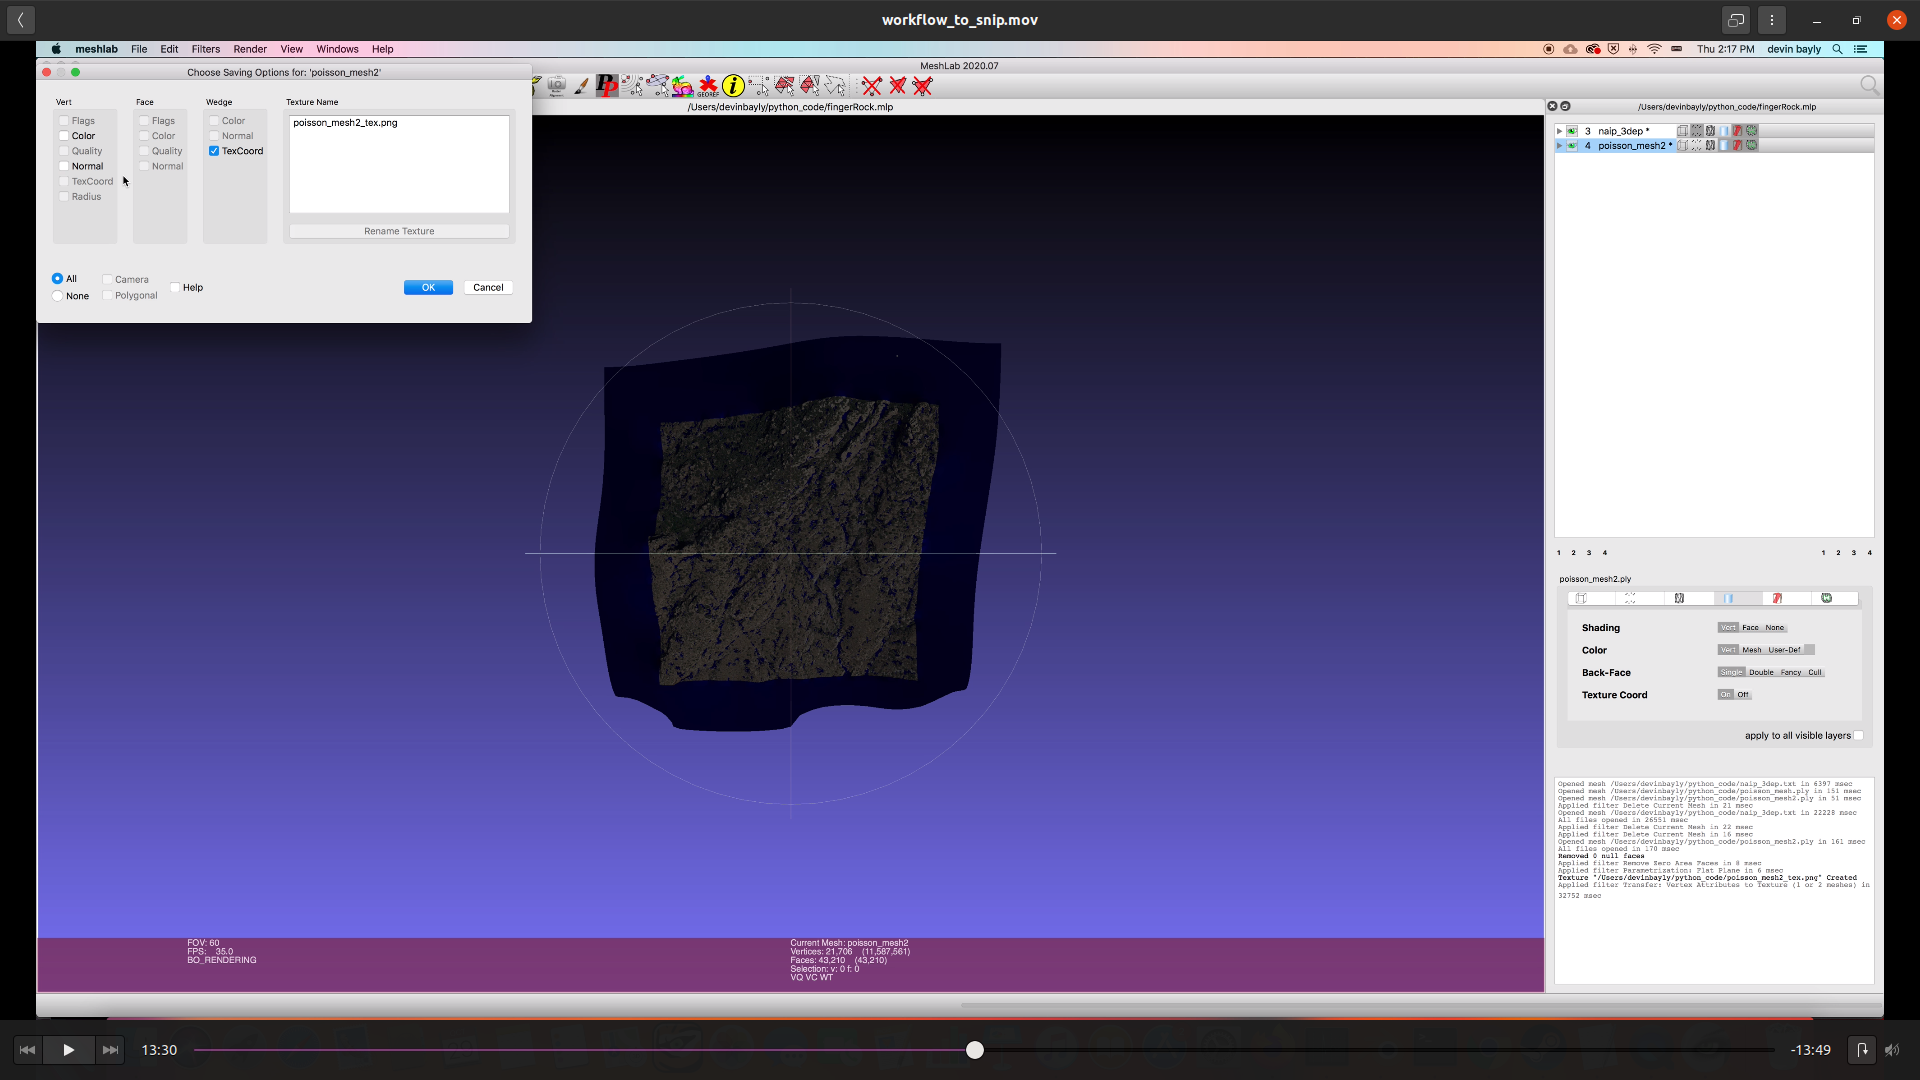
Export mesh as .obj screenshot
screenshot
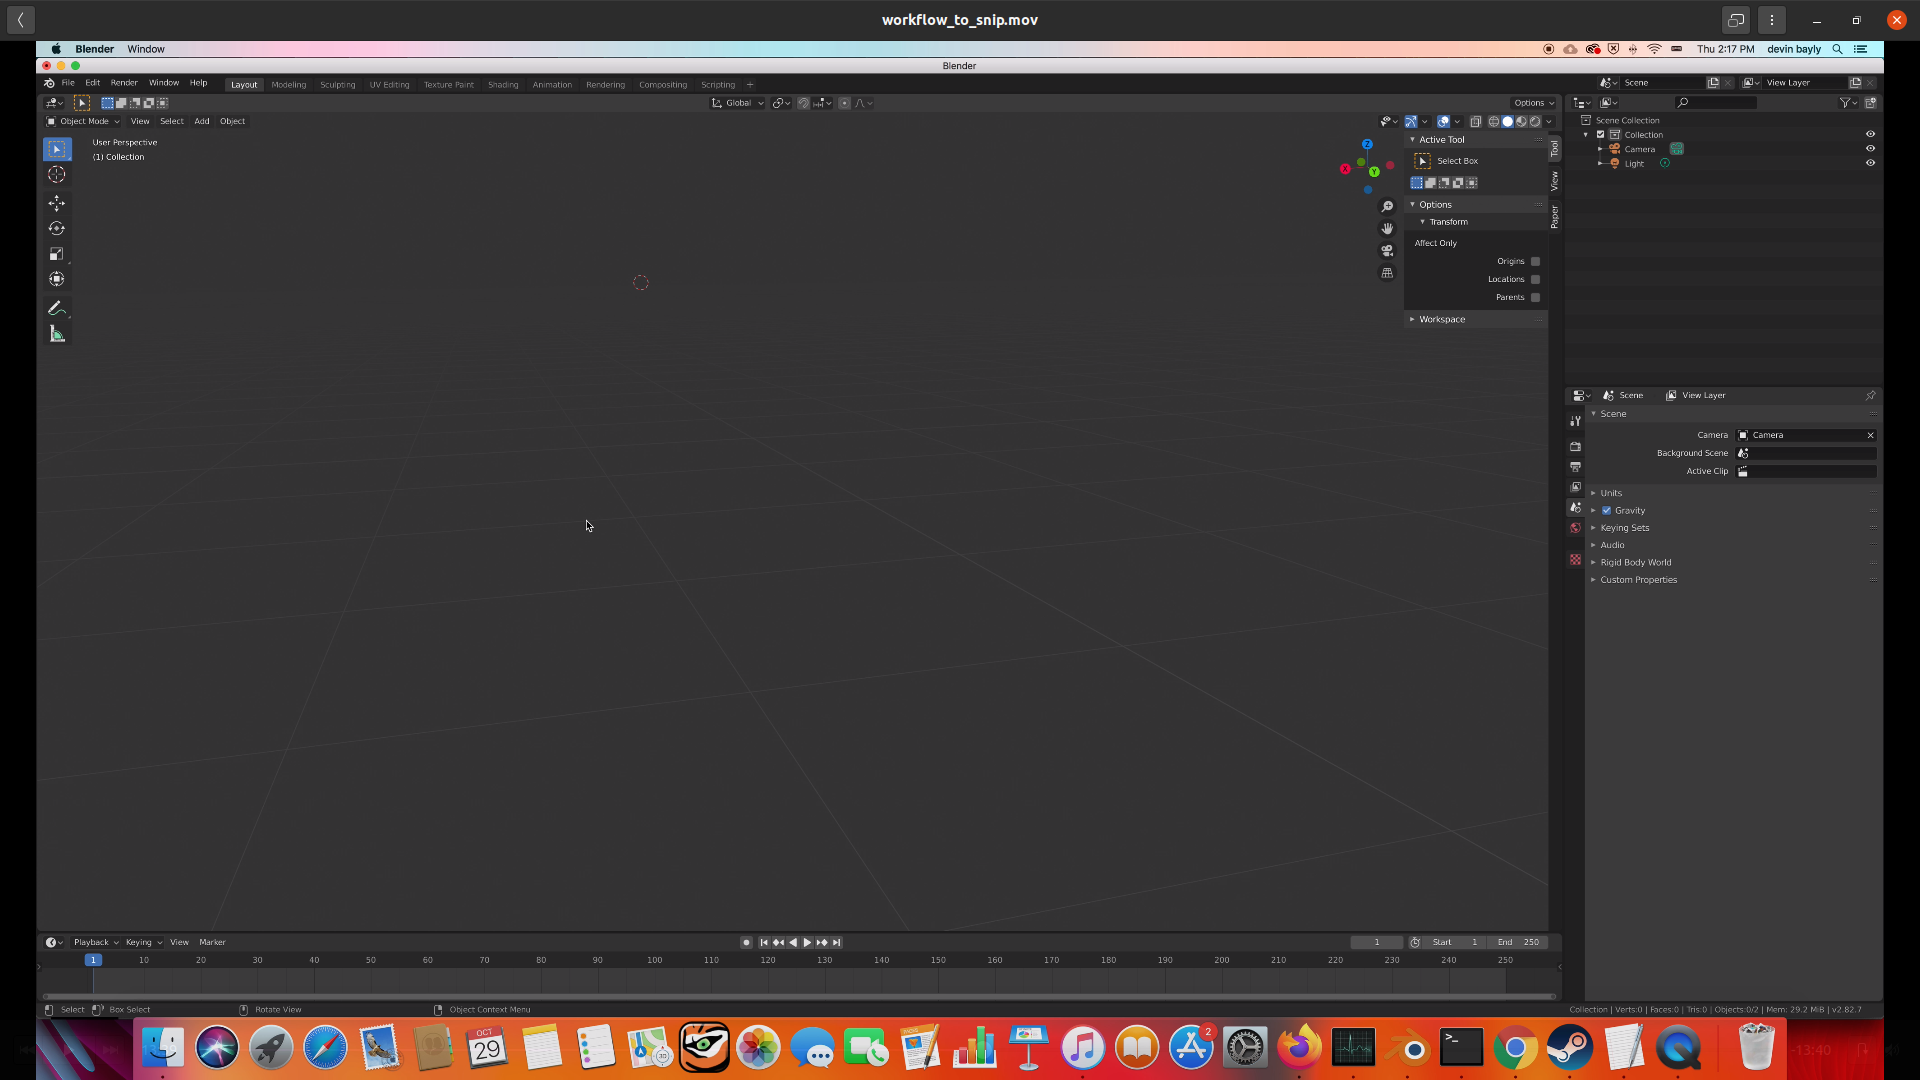
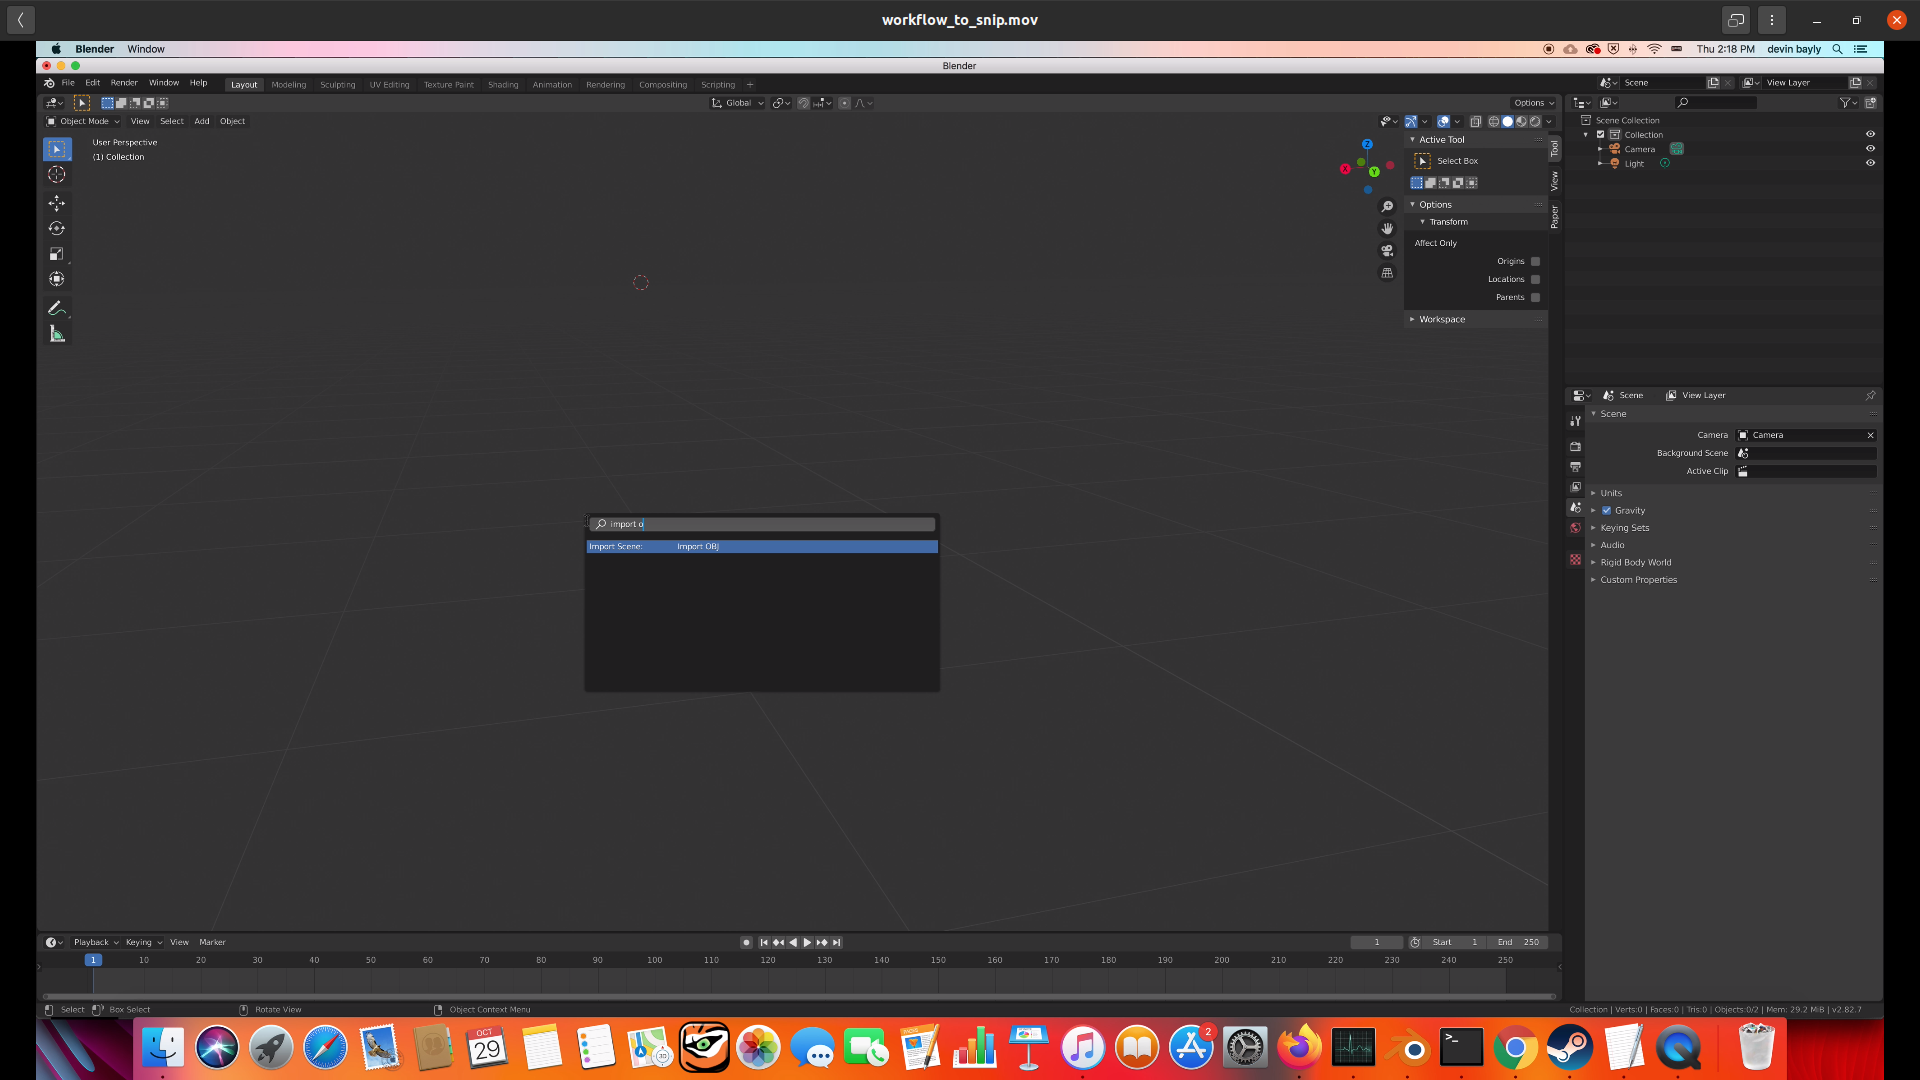
.glbOpen blender screenshot
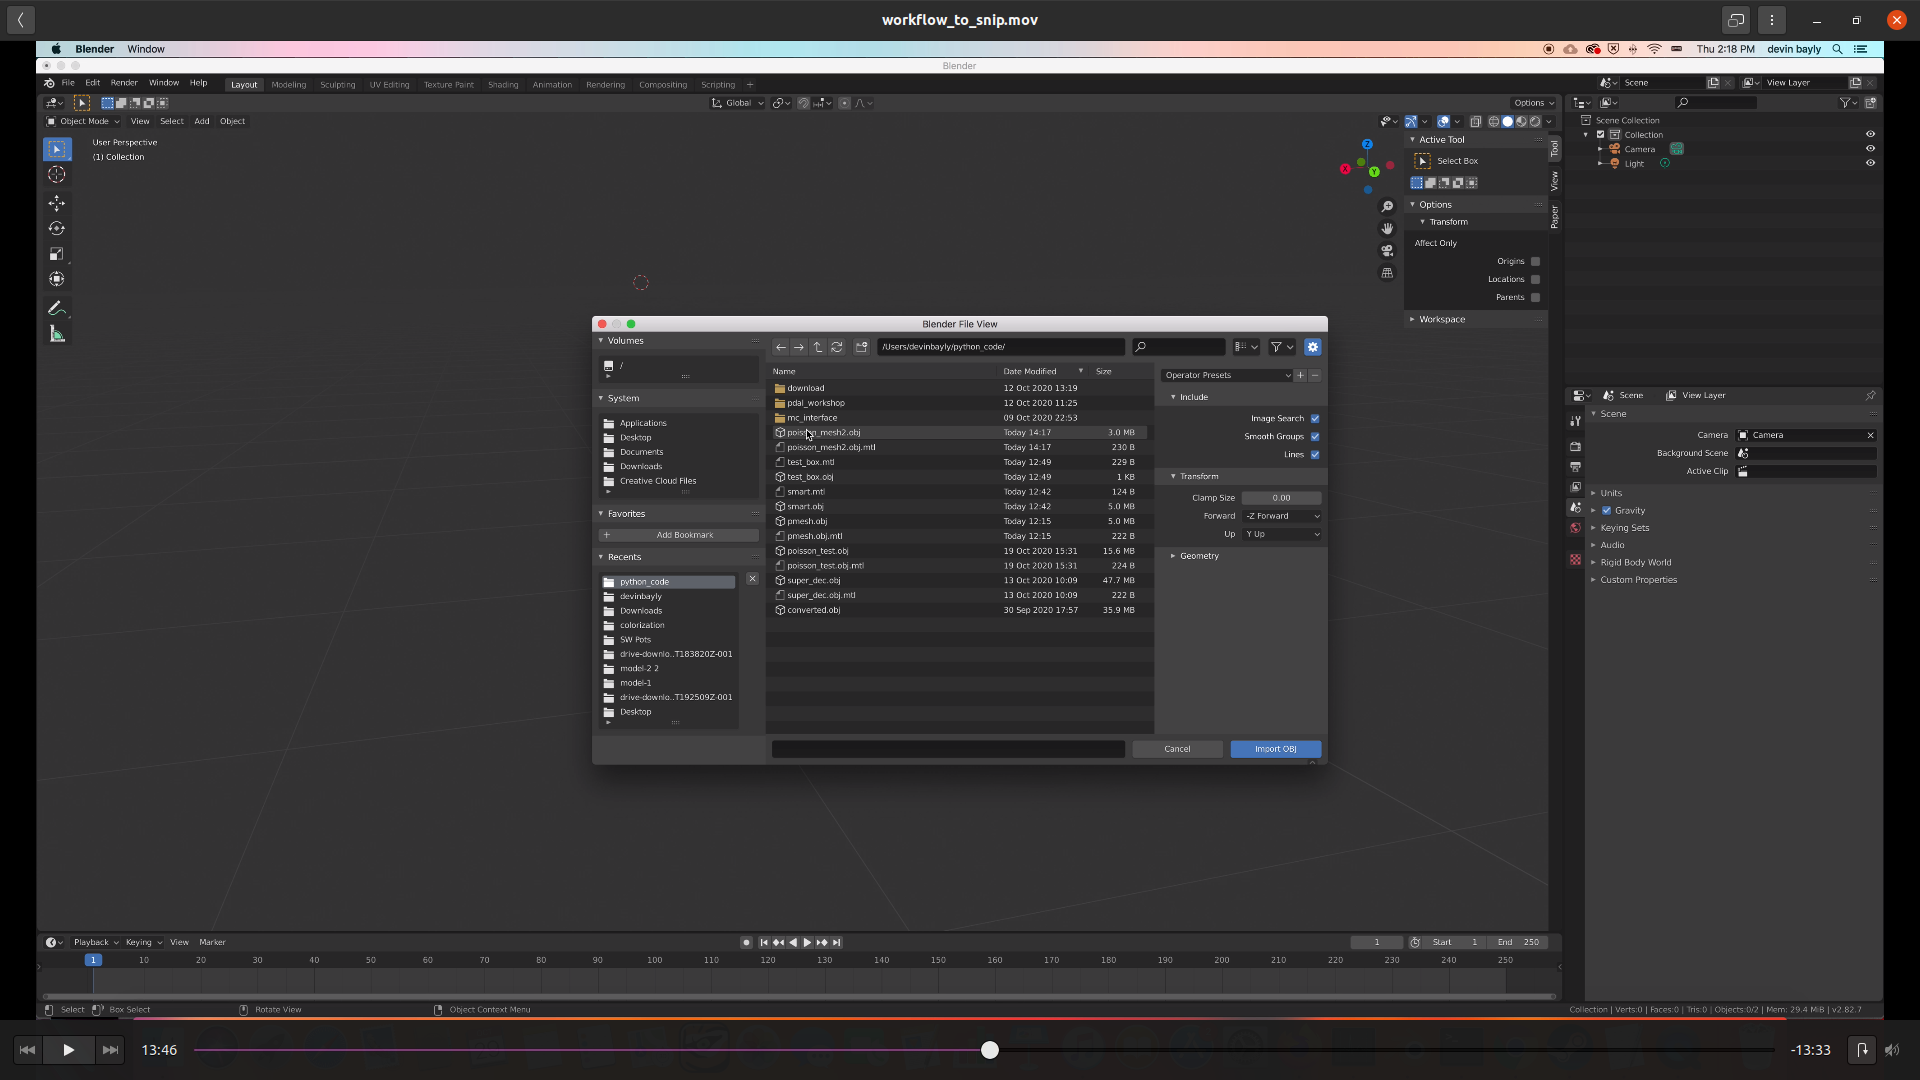
Import .obj (its also an option under the file menu import) screenshot
Select file from folder where you saved it screenshot
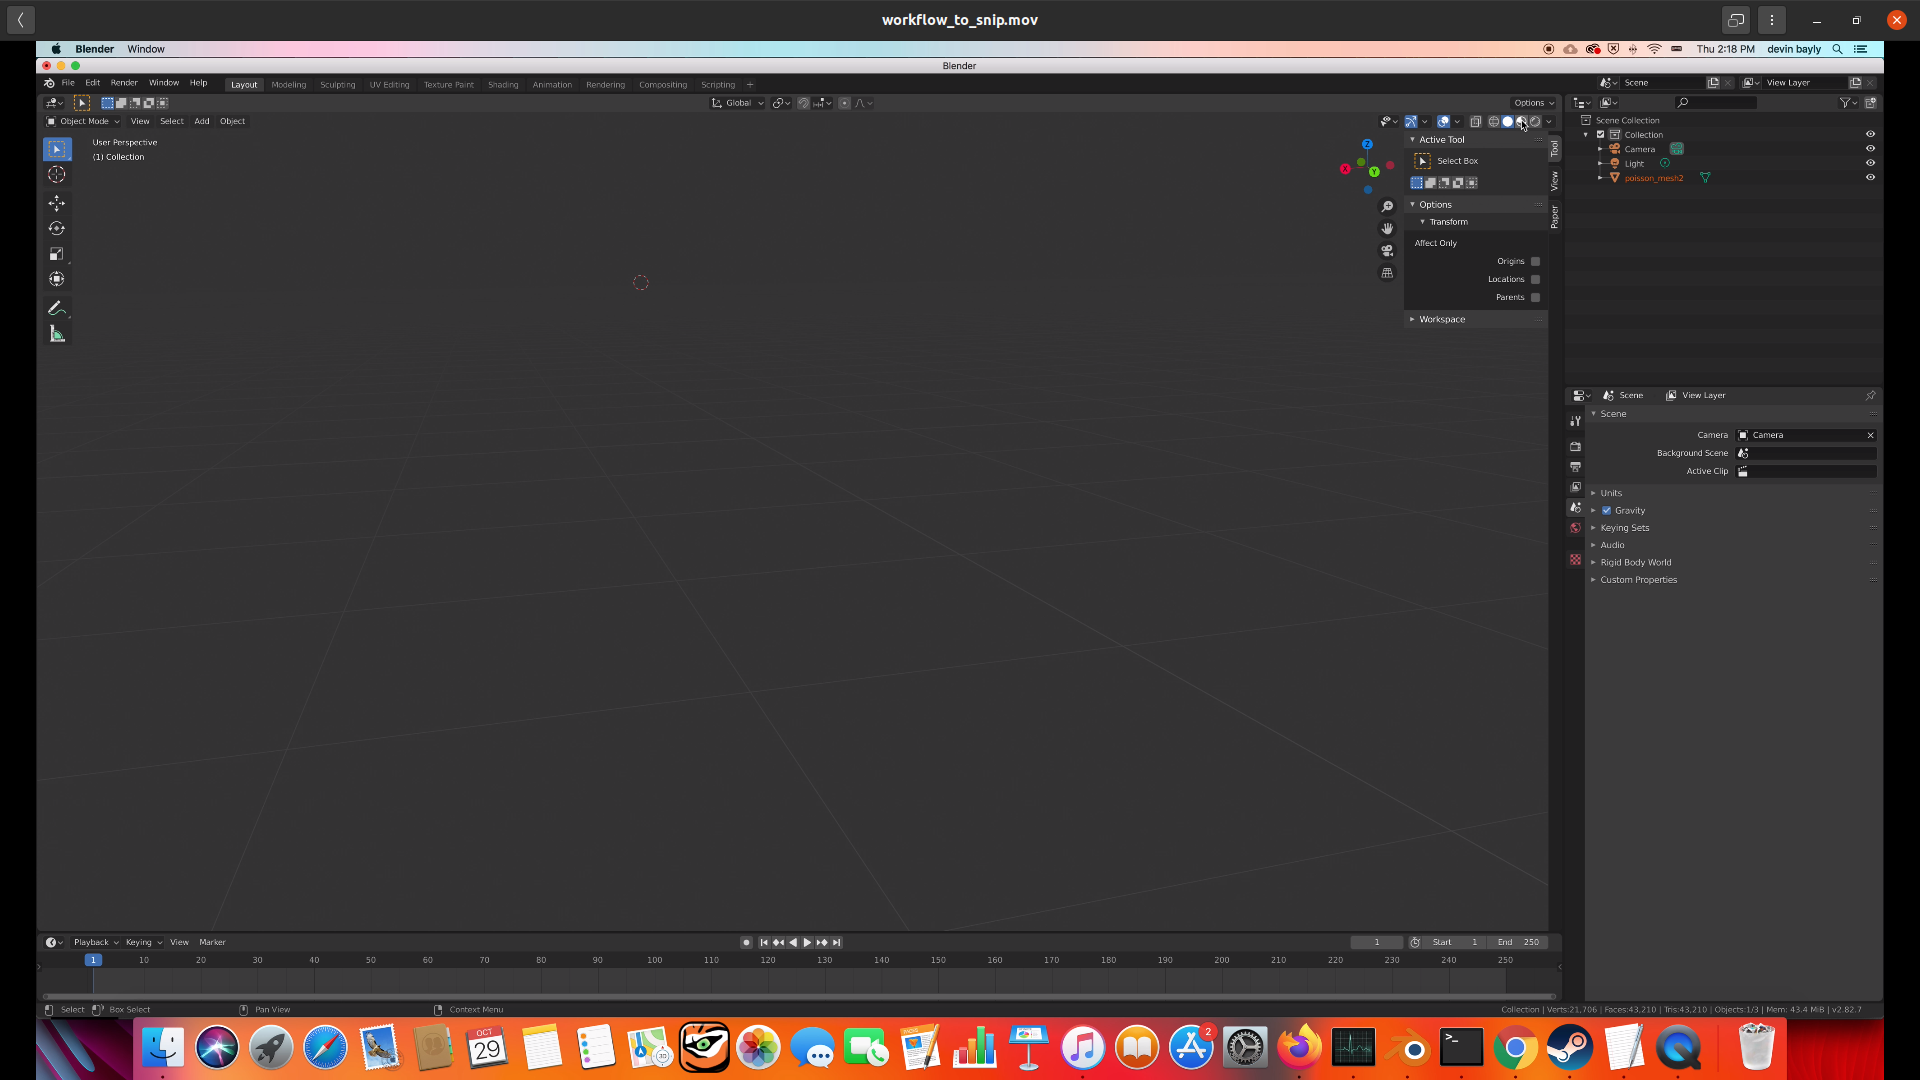
Turn on material shading so we can tell our model is colored correctly screenshot
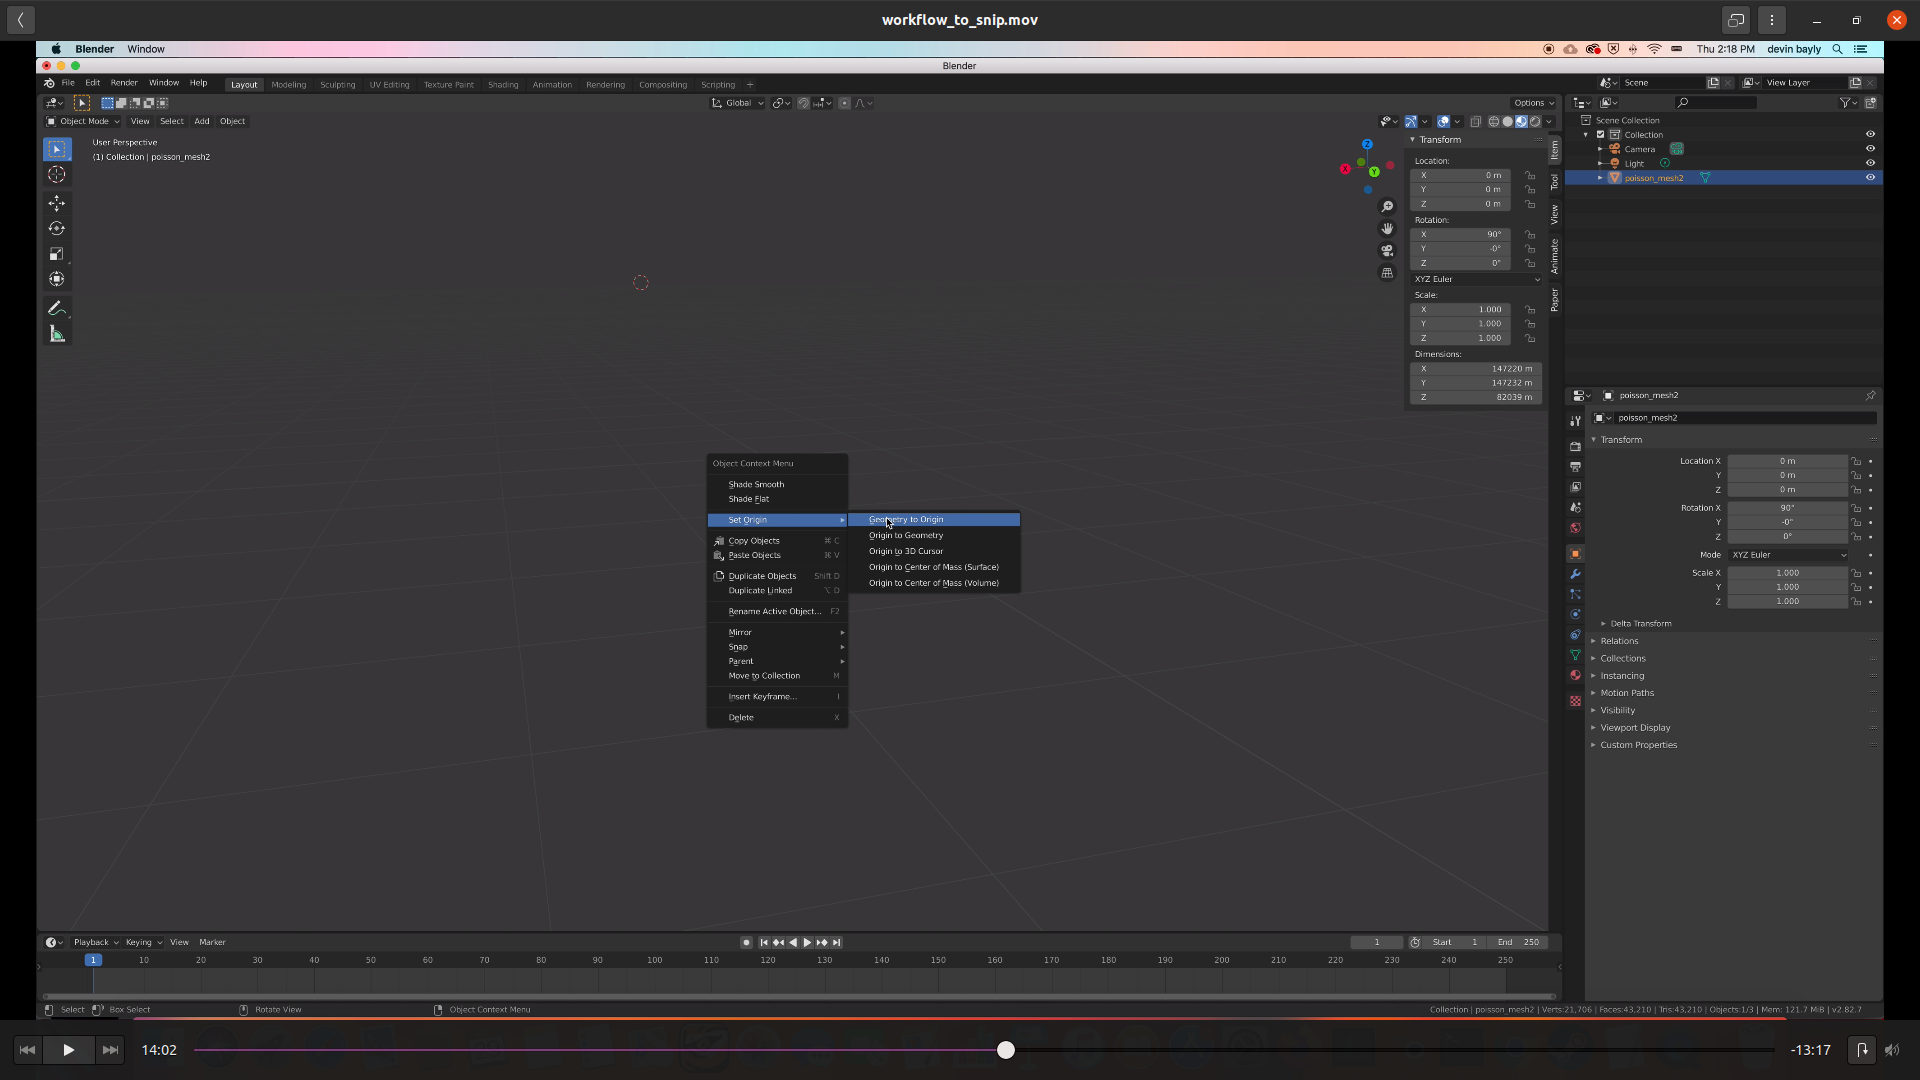
Select model and set geometry to origin (lidar points position usually ) with the right click mouse and set_origin option screenshot
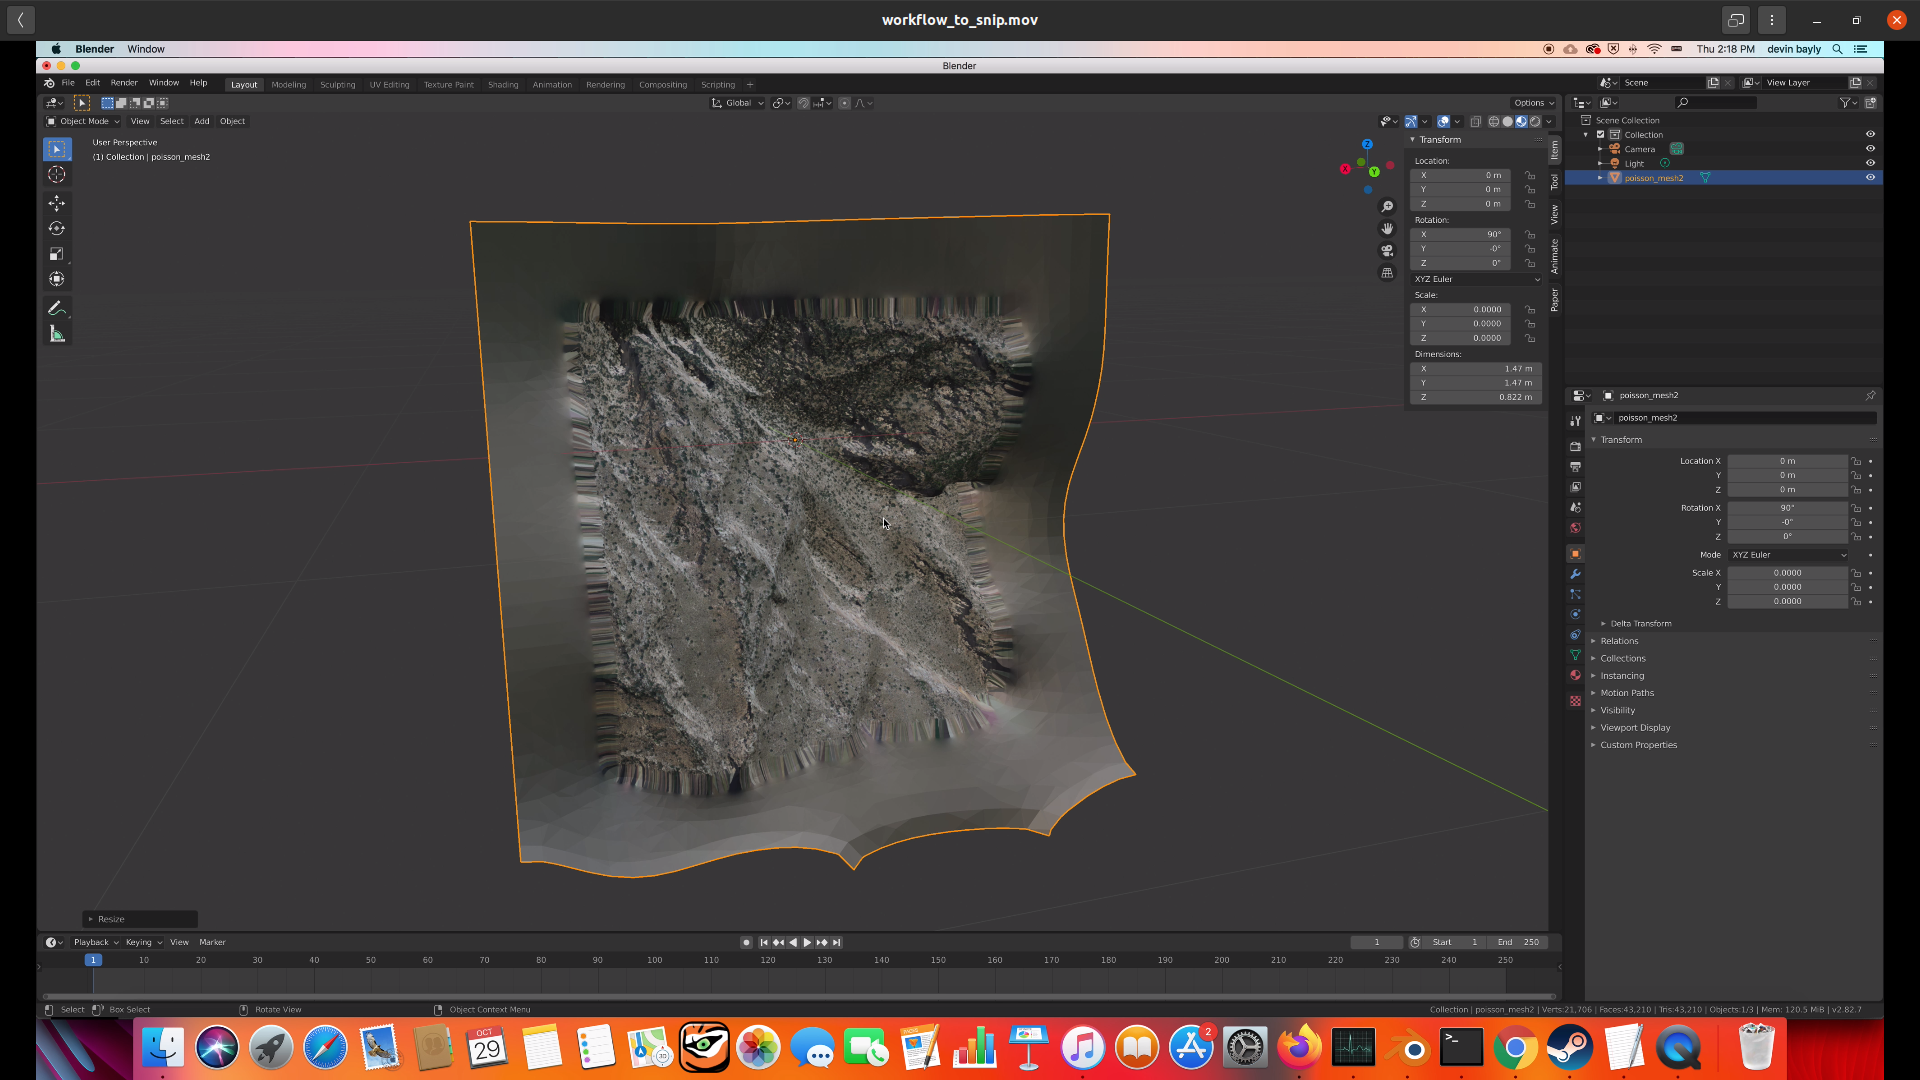
Scale down the model so we can see it, press s key and then type .0001 to make it 1 /10000 th of its current size, and press enter screenshot
Set X rotation to 0 (might have to press the n key first to get the transform window to appear) screenshot
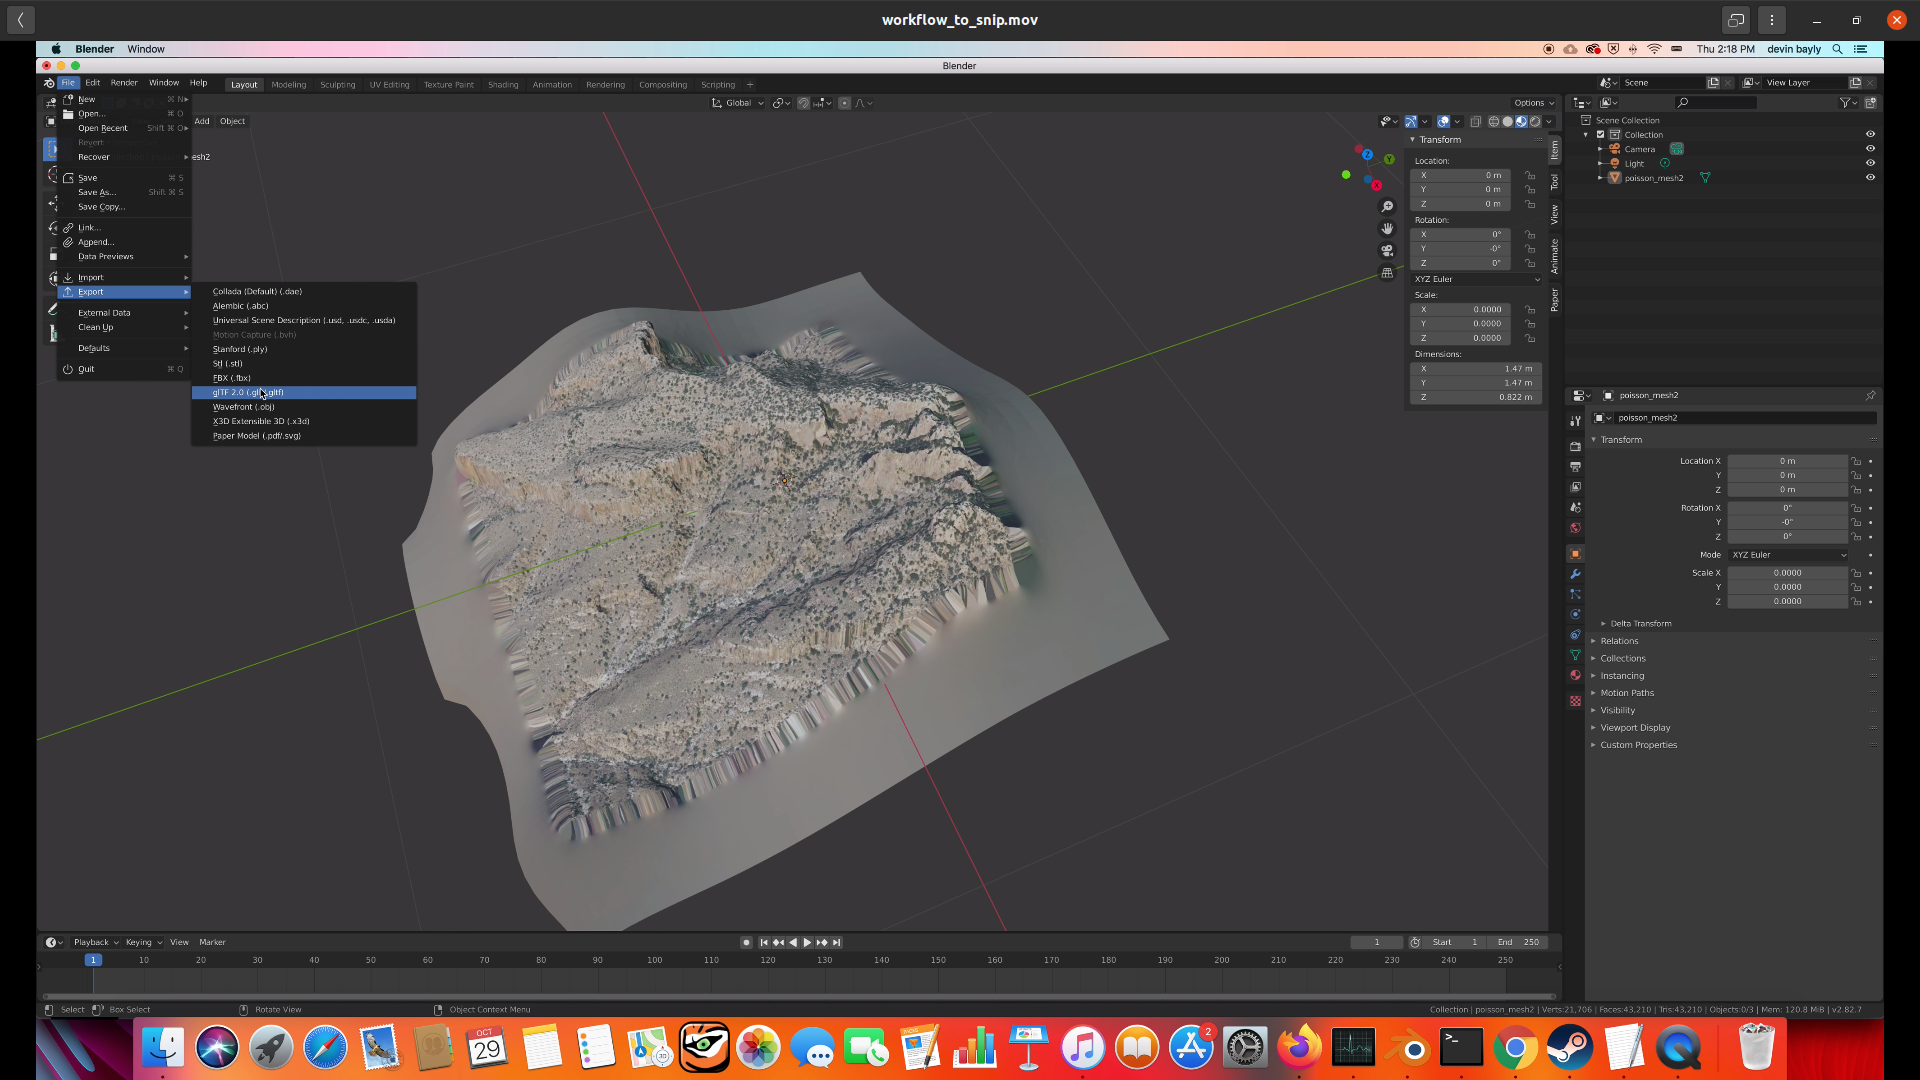
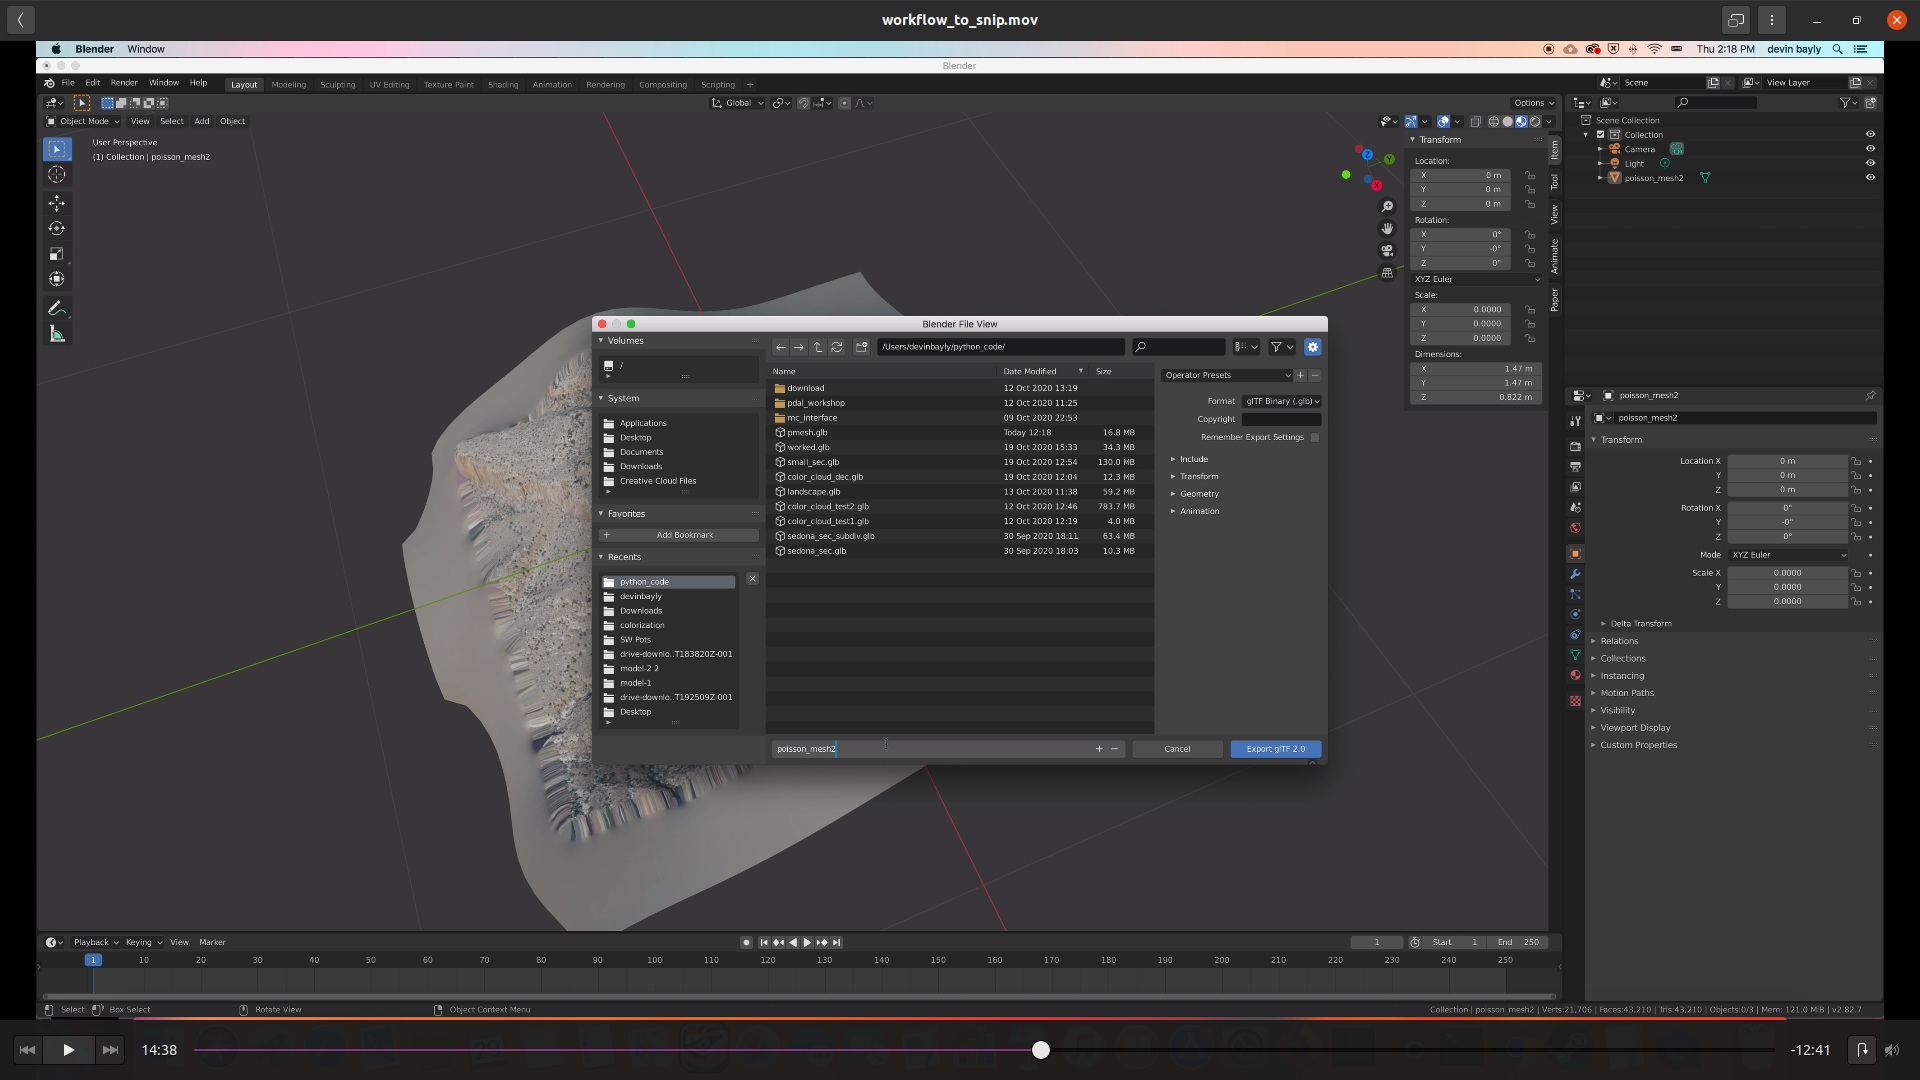
Export as gltf option, we will be using the .glb that is by default screenshot
Name export file something like poisson_mesh and the glb will be added on its own screenshot
We will be using glitch.me For our free websites that we can use to view our work in VR and AR! Without making an account (painless, free) you can use your websites for 5 days before they are deleted.
pmesh.glb we created in blenderWe need the above steps for both versions of the webpage
Lets start with the AR example, its a bit easier to setup
ar-template.html file and copy the contens to the clipboard (ctrl-c usually does the trick)index.html file and paste the contents of the ar-template.html in over all the existing textpmesh.glb asset icon, and copy the link it providesindex.html file and paste the link inside the quotation marks where it says paste here!!, don’t overwrite the quotation marks as they are neededFor the VR version we are going to do more or less the same steps
vr-template.html file and copy the contens to the clipboard (ctrl-c usually does the trick)index.html file and paste the contents of the vr-template.html in over all the existing textpmesh.glb asset icon, and copy the link it providesindex.html file and paste the link inside the quotation marks where it says paste here!!, don’t overwrite the quotation marks as they are needed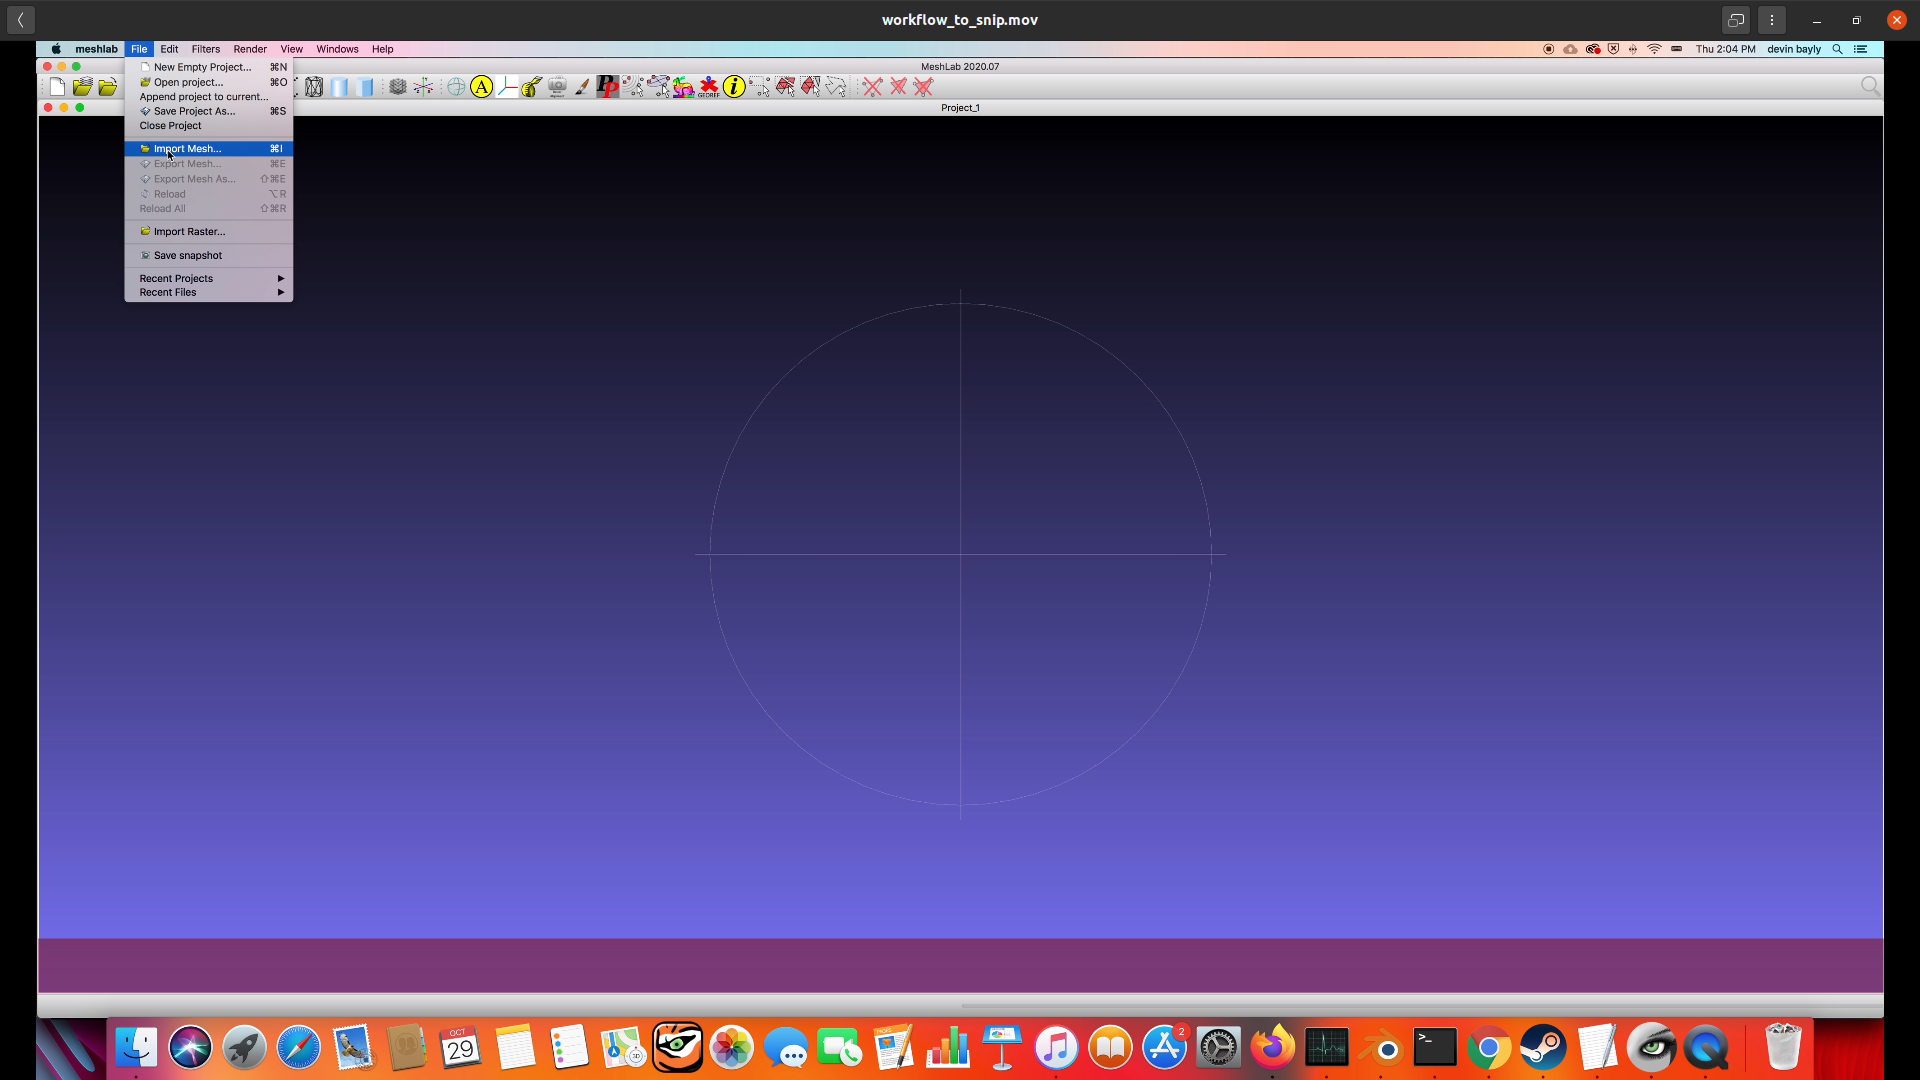